Wooden flooring design covers everything from light tones that brighten a small room to medium tones that hide the dirt a busy hallway collects, plus the patterns and installation methods that change what you pay and how long it takes.
What settles the choice is the tone that works with your light, the pattern that fits the room’s shape, and whether you are installing it yourself or hiring out.
The 2¼-inch standard board looks busy in small living rooms where extra-wide planks read as one open surface, and that width threshold is the first cut I would make standing in the lumber aisle.
1. Light Tones Wooden Flooring
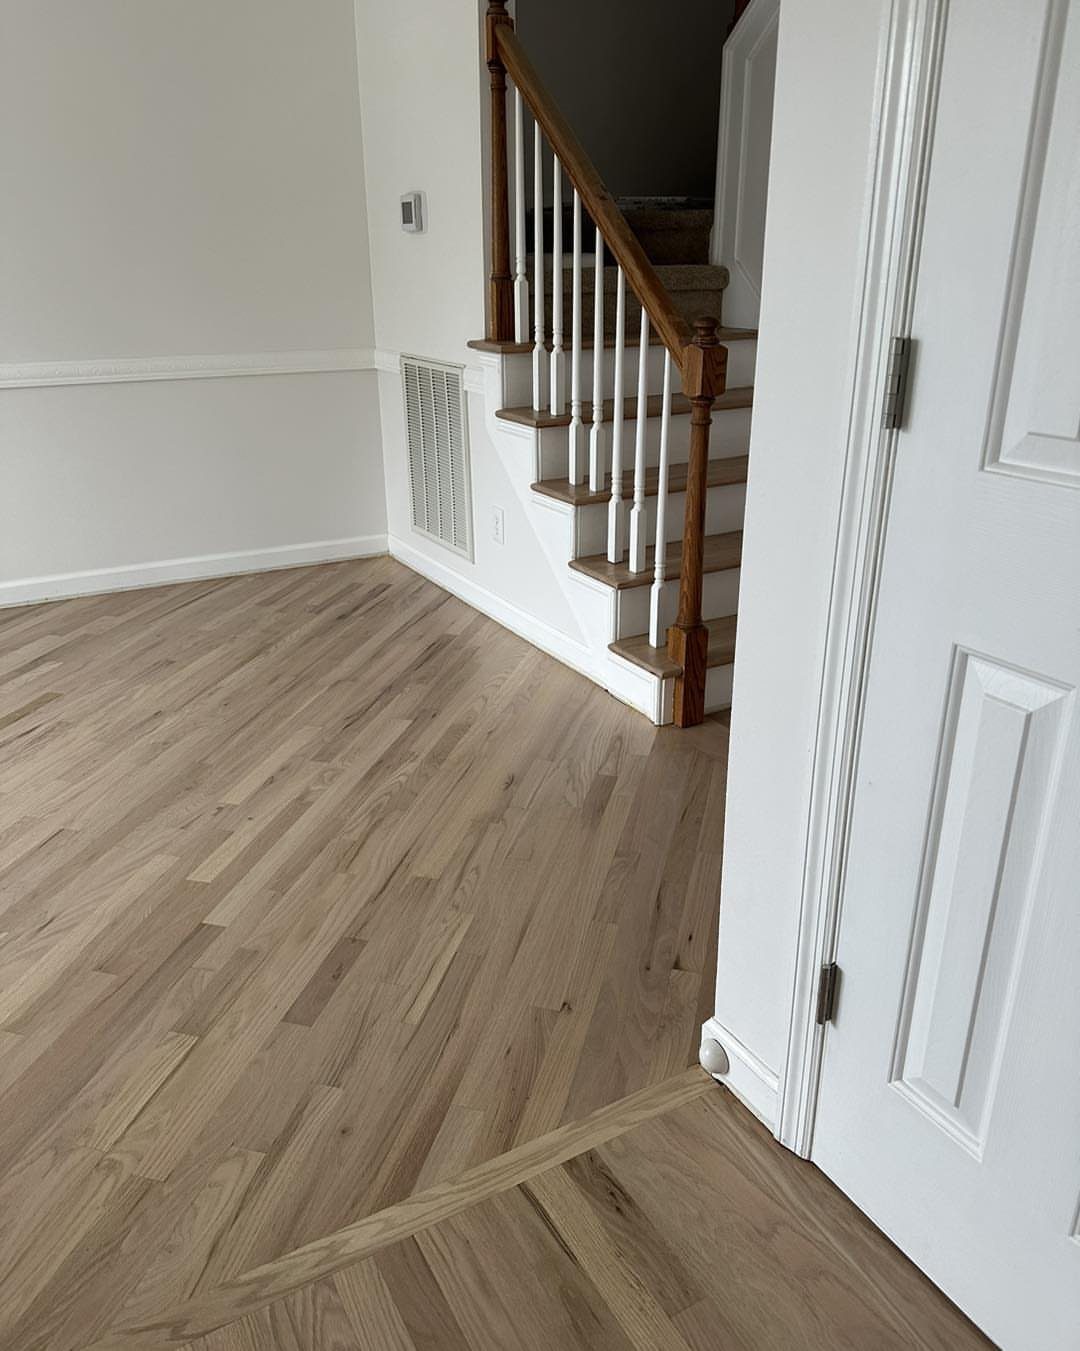
Light-toned floors bounce daylight around a room like almost nothing else, which makes them my first pick for north-facing spaces or anywhere the windows are small.
White oak and ash in natural or bleached finishes read as warm rather than sterile, and they hide dust better than mid-tone woods. Running planks with the sightline stretches a hallway further than crosswise placement would.
Solid oak in these pale finishes runs higher than softwood or laminate, and installation is on top of that. Engineered versions with a thick wear layer cost about the same and handle radiant heat better.
I’d go solid only if I planned to refinish eventually; for a rental or a first home I’ll sell before long, engineered gets the look without the commitment.

Ideal to fill gaps, nicks and scratches on wood, laminate and vinyl flooring

Use on wood, cork, tile, resilient, and other hard surface floor coverings.

【Light Natural Oak Wood Grain & Thickened Material】 Our peel and stick floor tile features a light natural oak base with fine natural oak grain lines,ring-shaped patterns,subtle color transitions,making it a premium wood peel and stick floor tile choice.Composed of wear-resistant layer,high-definition wood grain print layer,thickened vinyl substrate layer,and strong self-adhesive backing – provides excellent stability and durability,ideal for long-lasting waterproof vinyl flooring applications.
2. Wide Plank Flooring
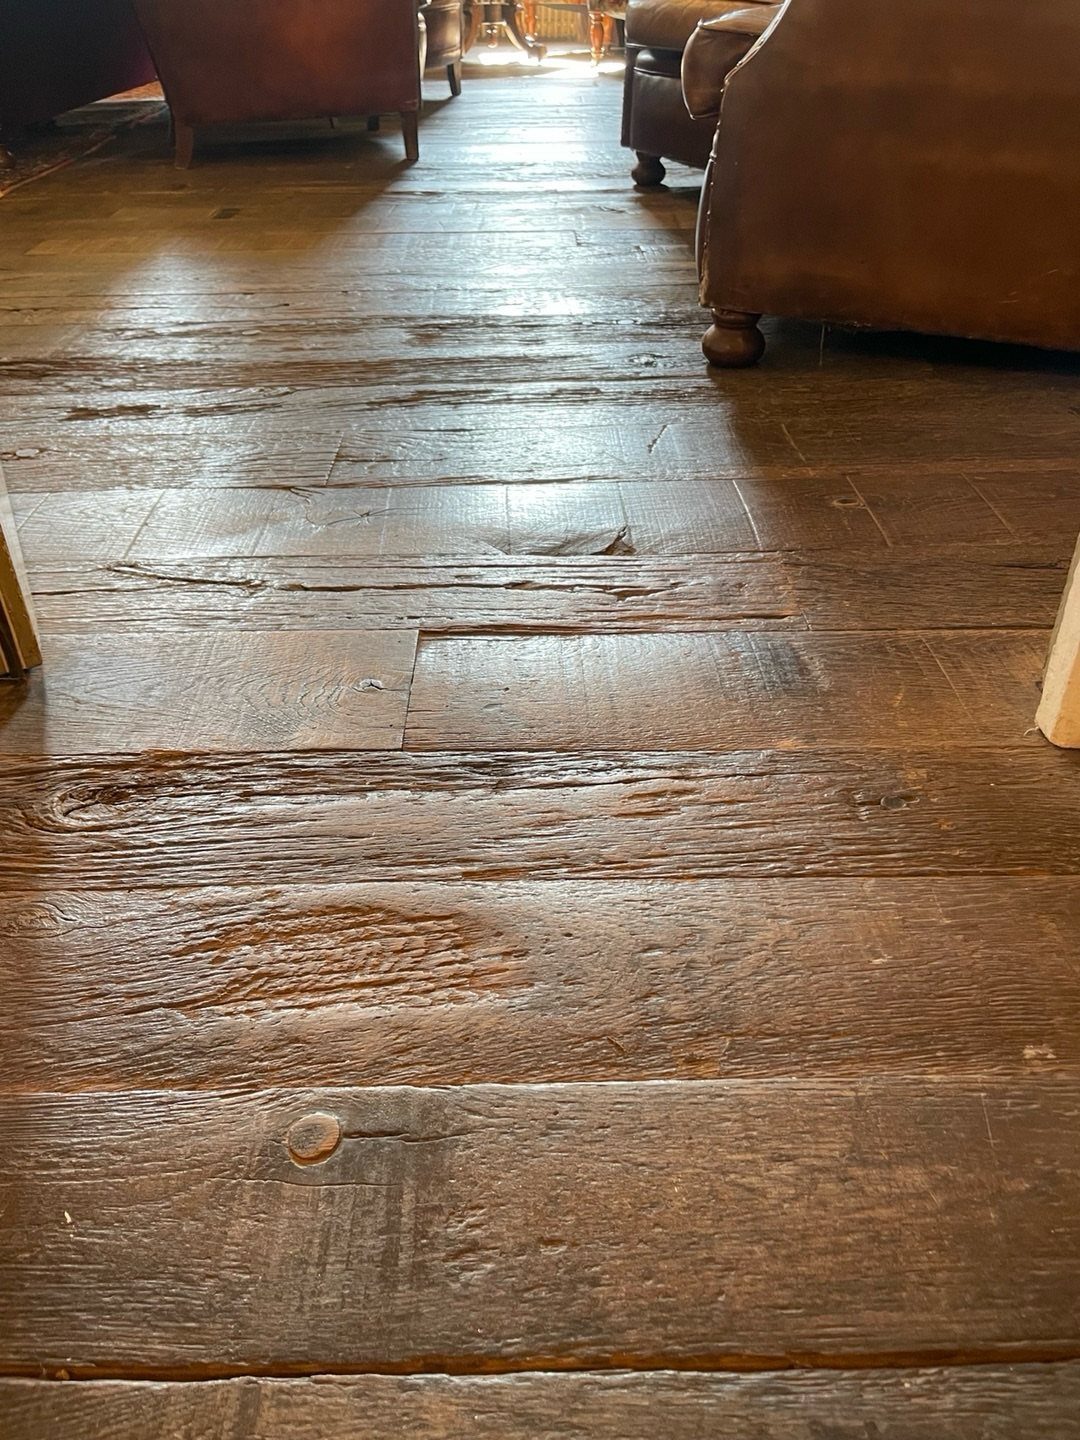
Extra-wide planks change how a whole room feels. Fewer seams means the eye reads the floor as one surface, not a grid, and that openness suits smaller living rooms where standard 2¼-inch boards can look busy.
The dark, distressed oak above shows the character that wide planks show off: knots, grain movement, and the saw marks that factory distressing mimics.
Reclaimed barn wood needs checking for old nails and costs more than new stock. New wide-plank engineered options skip the structural headaches of reclaimed material.
Either way, acclimate the boards for a full week before laying them; wide planks move more with humidity swings, and gapping shows up worse on broad boards than narrow ones.

Genuine French Oak Construction: Crafted from authentic French Oak, offering natural elegance and character.

Crafted from high-quality hardwood, the Napa Valley European White Oak Engineered Hardwood Flooring guarantees unmatched durability and resilience

Timeless Elegance: Parquet flooring adds a touch of sophistication and warmth to any room with its intricate patterns and rich wood tones.
3. Hardwood Flooring
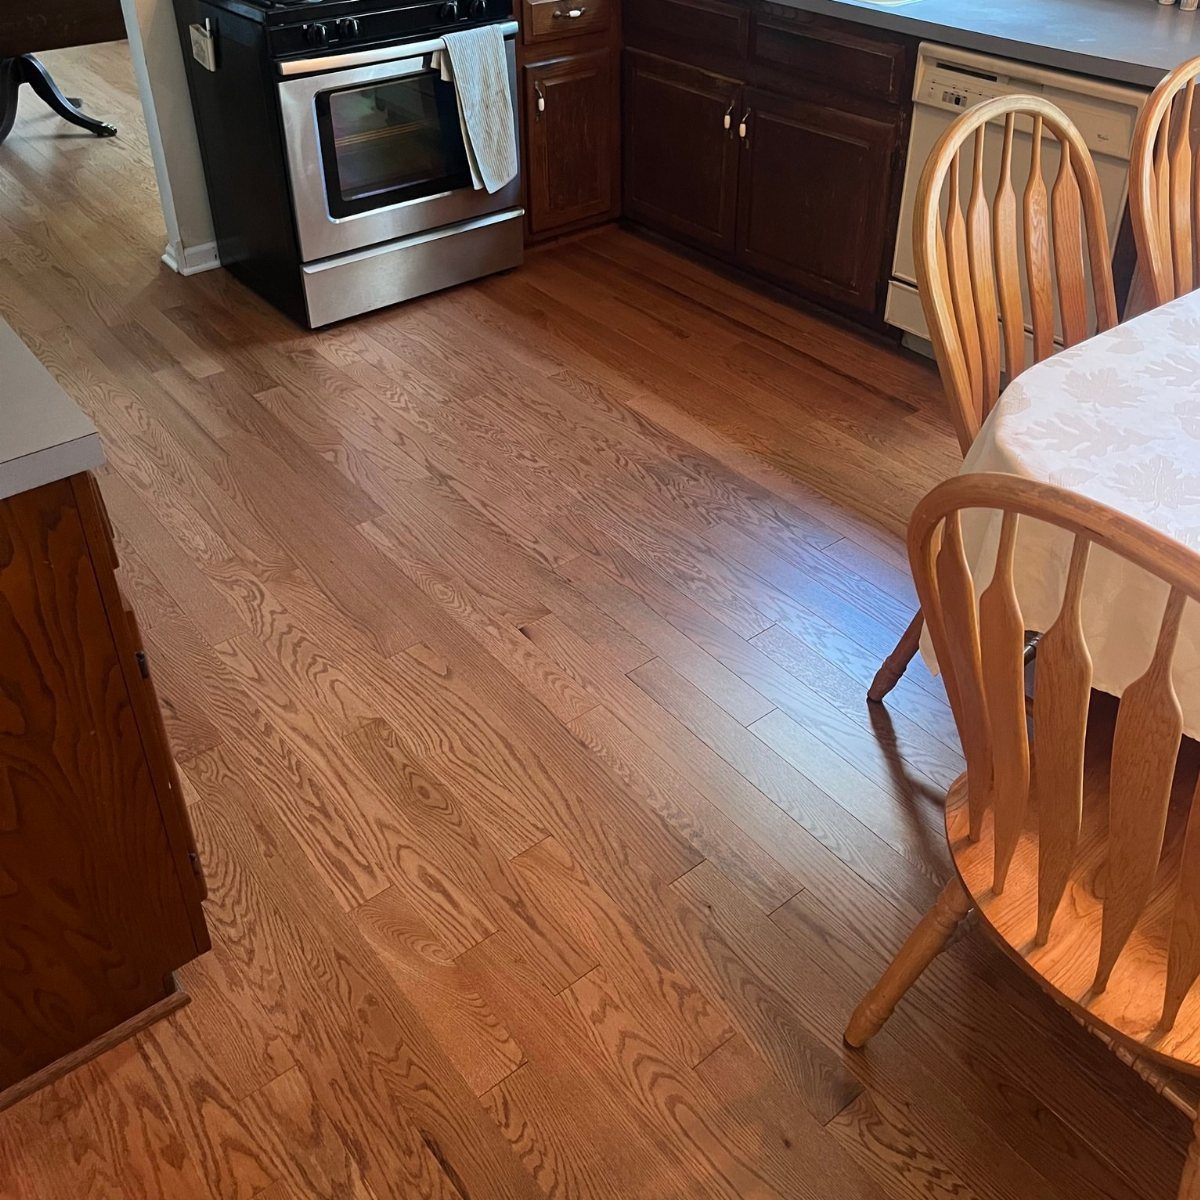
Solid hardwood is the only floor you can sand down and start over, which matters if you’re keeping the house long enough to wear through a finish.
Oak works in kitchens and entryways because it’s hard enough to take abuse, soft enough to cut and sand with standard tools. Hickory ranks harder and handles dogs better, but it costs more and fights back during installation.
Site-finished oak lets the installer feather the stain to match existing trim. Prefinished planks speed up the job and skip the dust, yet the beveled edges collect grime and the color is locked in.
Solid hardwood costs more upfront than engineered, but one refinish pays back the difference.

[Realistic Wood Grain with DIY Options]: With a super realistic wood grain appearance and various color options, these tiles meet personalized decorative needs. They are versatile enough for use in homes or commercial spaces, suitable for shop decoration, rental renovations, and RV flooring projects.

🏠DETAILS: 15.8x78.8 Inch, total 8.65 sq.ft (40cmX2m) Made of durable thin vinyl, thickness: 0.015 In (0.4MM). Peel and stick wood planks vinyl flooring roll, brown shiplap planks color. Waterproof. Removable.

Sleek & Modern Black Finish:Featuring a deep matte black surface with subtle wood-like texture, this flooring adds a contemporary, elegant touch to any space—perfect for modern, industrial, or minimalist home decor styles.
4. Herringbone Pattern
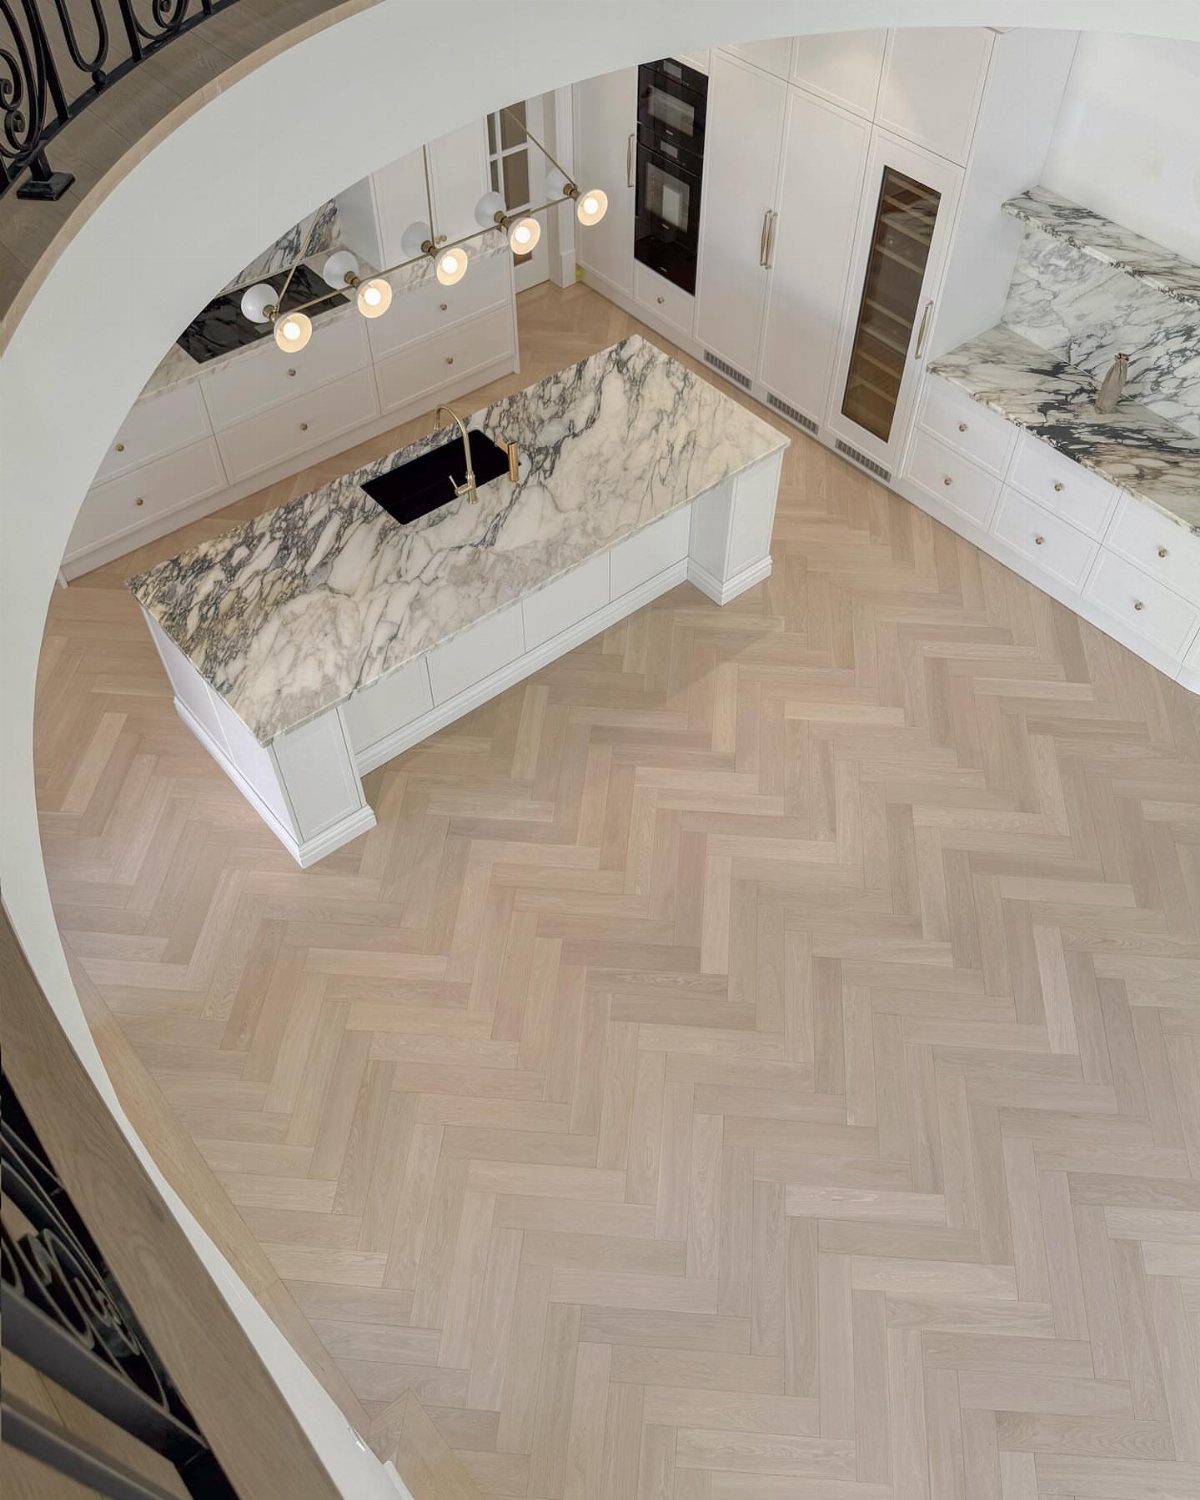
Herringbone reads as effort. The pattern adds visual texture without competing with marble counters or open shelving.
Installation runs slower than straight lay: each plank needs two angled cuts, and the starting line has to be dead true or the whole field drifts. Glue-down is standard for herringbone, with a flat subfloor a must.
Herringbone burns through extra material for waste and needs a skilled installer; this is a splurge that pays off in resale.

RECLAIMED WOOD ACCENT: Real reclaimed and recycled wood, naturally-weathered wood paneling adds a beautiful, rustic accent to your walls


Real Wood Wall Planks: 100% Real Barn Wood Wall Planks With Natural Knots and Dents, the Surface Of Wood Shiplap Planks Is Processed With High Temperature Carbonization, the Real Wood Wall Shiplap Planks Is Non-Toxic, Sterilized and More Safe For Children, Voc Free Process Ensures These Stick on Shiplap Planks For Walls Are Safe To Use In Home
5. Straight Pattern
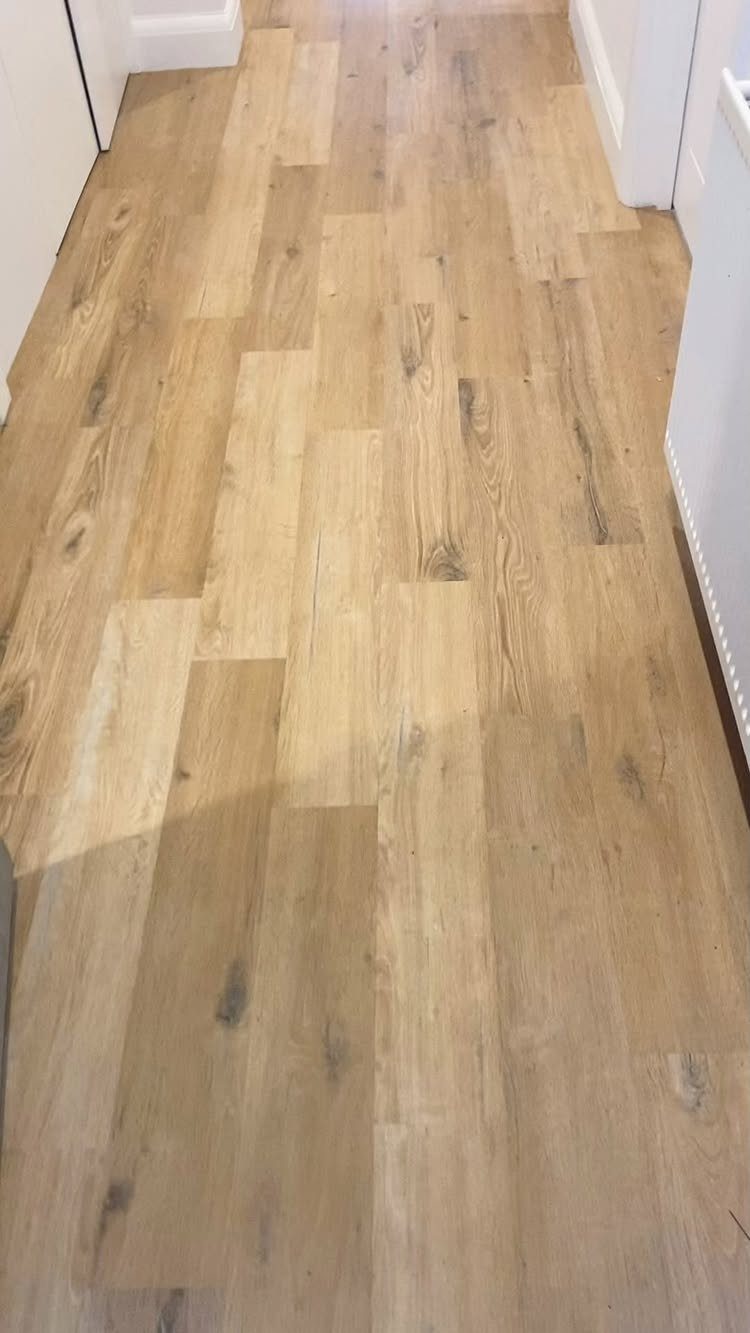
Straight lay is the default for a reason. Running planks parallel to the longest wall stretches a narrow hallway, while perpendicular placement can widen a galley kitchen.
Stagger the end joints by at least 6 inches so no seam line draws the eye; the natural variation in tan and beige tones here does the rest of the work.
This is the pattern to learn on if you’re installing yourself. Floating click-lock systems go down over foam underlayment in a weekend, and the only cuts are straight.
Solid hardwood needs frequent nailing and a pneumatic stapler rental, but the material itself is the cheapest way into real wood. Either way, let the boards sit in the room for several days first.

Machine Washable & Easy to Clean: The surface is designed to be water-repellent. If beverages are accidentally spilled, simply wipe it up quickly with a towel, the liquid won’t soak in right away. For spots that are hard to clean locally, you can also use a cleaning agent or wet wipes on the rug. A vacuum cleaner can be used for quick everyday maintenance. The rug is also machine washable, so it can be cleaned in a washing machine

This Indoor Family Use Runner Rug perfectly fits narrow spaces such as hallways, entryways, kitchen aisles, and bedroom corridors—key indoor scenes for daily activities. For busy working parents who have no time to clean frequently, it reduces the burden of daily maintenance; for families with pets (dogs, cats), it effectively resists pet urine, food residue, and hair adhesion.

Machine Washable Rug: This 2x10 runner rug is bringing a modern, abstract decor to your home that is also easier to clean.To clean stains from red wine, coffee, food crumbs, you can use a carpet cleaner to hand wash and spot clean,for large indoor rug home washing machines may not have enough capacity,it is recommended that you take it to a professional laundry.
6. Chevron Pattern
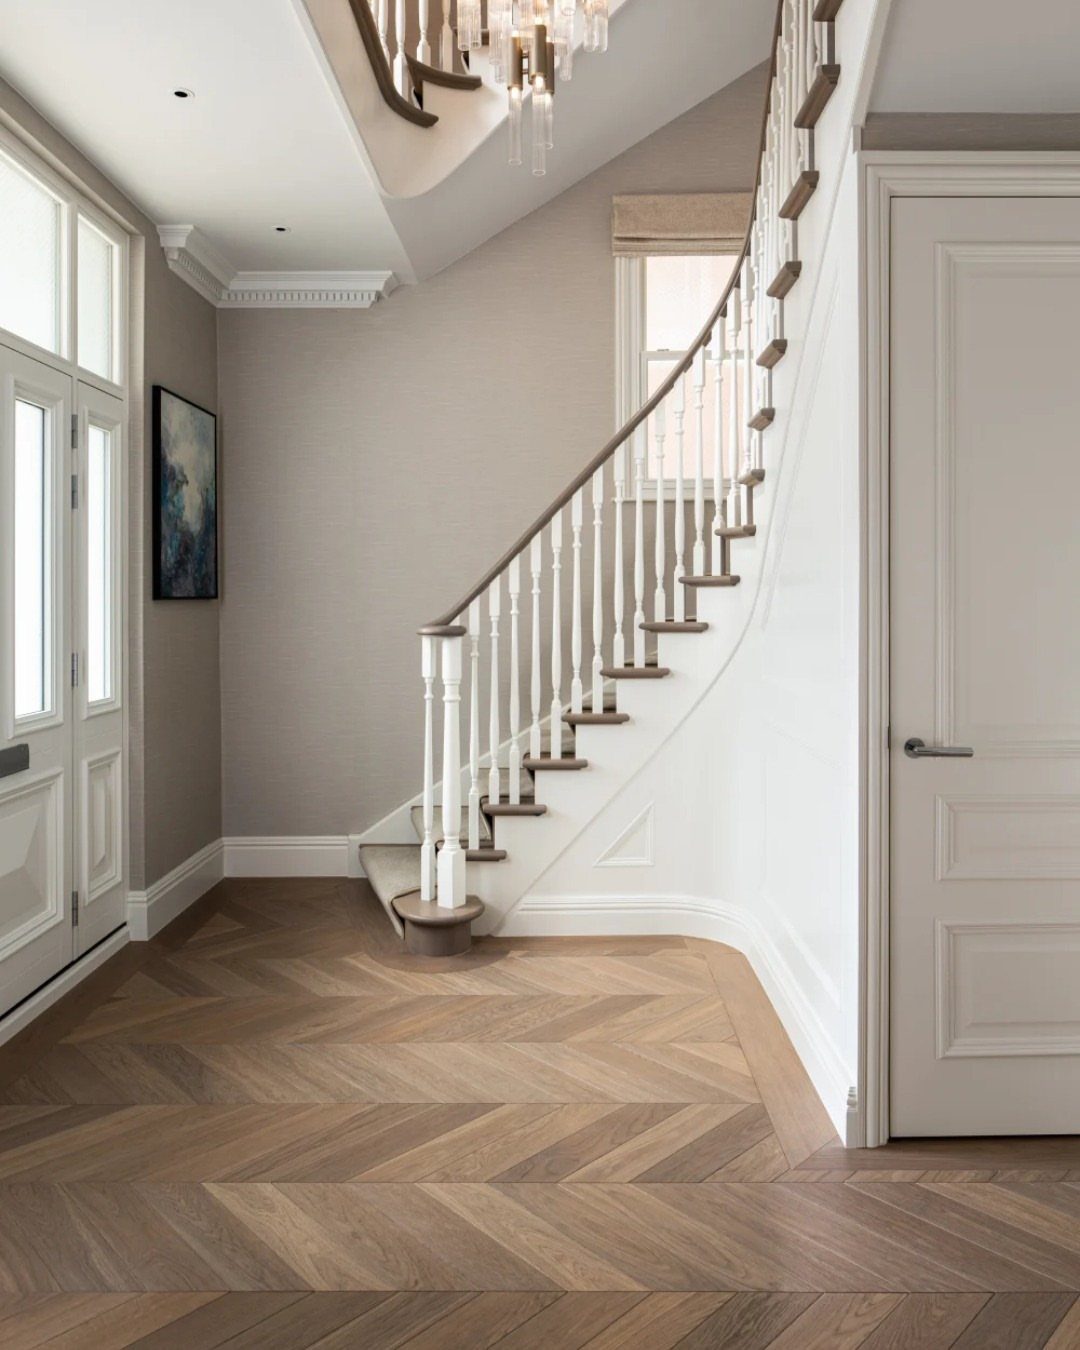
Chevron sharpens the herringbone idea. Where herringbone planks overlap at right angles, chevron’s mitered ends meet in clean points, so the V-shapes flow without the broken line.
Those mitered cuts waste more material and demand tighter tolerances. A degree off at the saw multiplies across the room, so I wouldn’t attempt chevron as a first flooring project unless the planks are pre-cut parallelograms from the factory.
Factory-milled chevron runs high per square foot installed, or roughly double herringbone for a site-cut version. The streamlined look suits modern spaces where herringbone can feel too traditional.

Sizes & Package: You will receive 40 sheet Vinyl Flooring, which measuring 11.8x11.8 inch each, with a thickness of 0.05inch / 1.3mm. Cover around 40 square feet with this value package.

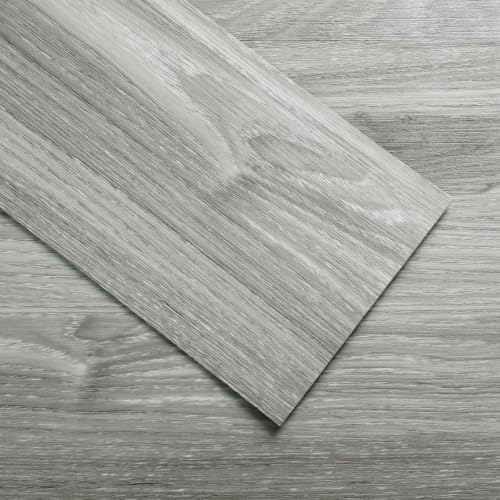
REALISTIC WOOD GRAIN: Vinyl plank flooring features a natural wood flooring look with clear grain texture, helping create a clean wood floor style for everyday home spaces
7. Diagonal Pattern
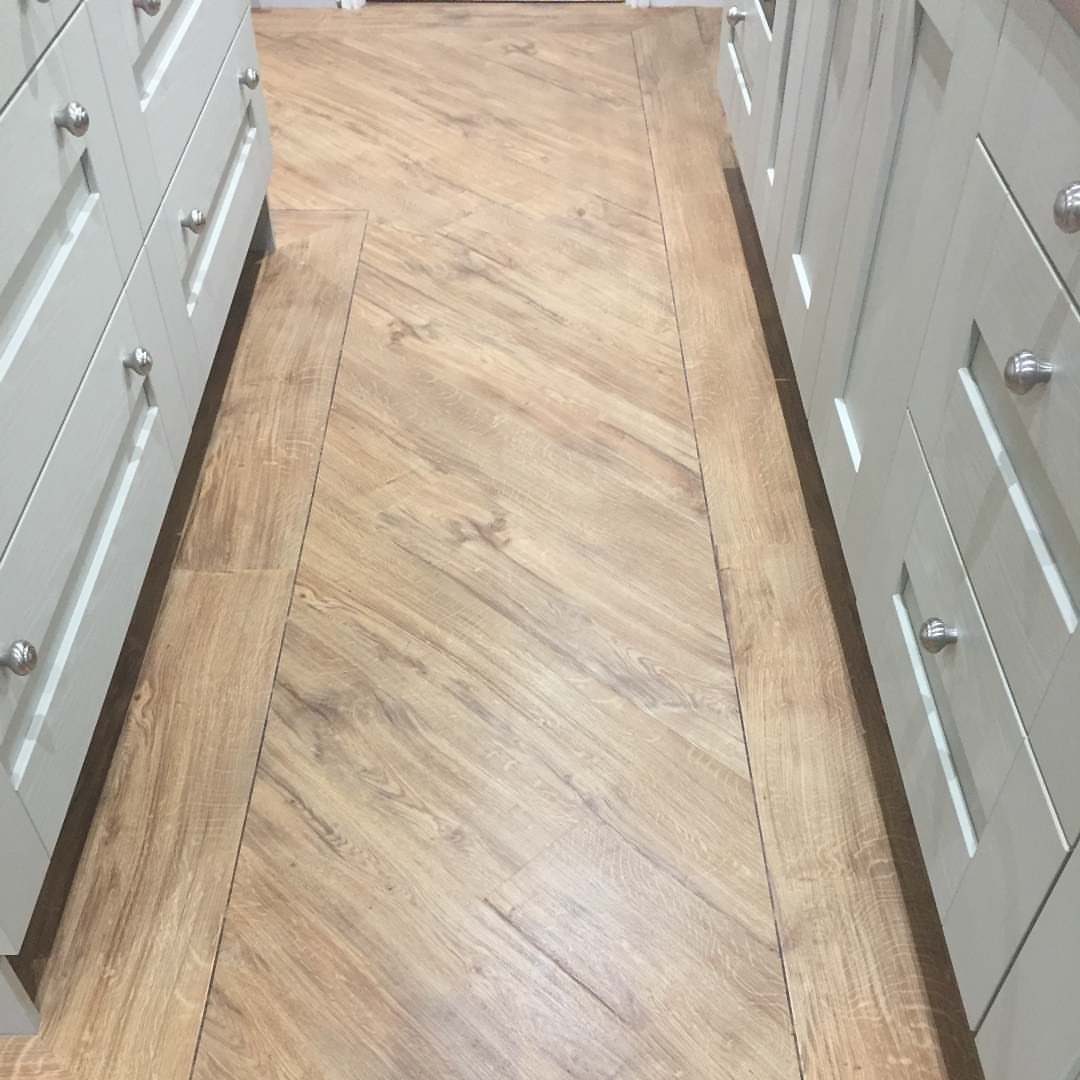
Angled cuts mean waste. Every angled cut leaves a triangle off the end of the plank, and you will buy noticeably more material than a straight layout for the same floor.
I would not attempt this as my first flooring project; the cuts are simple in theory but unforgiving in practice, and a gap at the wall line shows instantly.
If your room is already small and dark, though, the openness you gain is real.
For a hallway or galley kitchen, the extra material cost stays manageable over straight plank. Start your layout from the centerline and work outward; that way any unevenness splits at both sides rather than stacking on one wall.

THIS IS A FLOORING SAMPLE - Cut from an actual full-size Sierra White Oak plank so you can see the true color, grain variation, and wire-brushed texture before purchasing.


Produces high-quality hardwood flooring crafted from domestic and exotic species
8. Border and Inlay Detailing
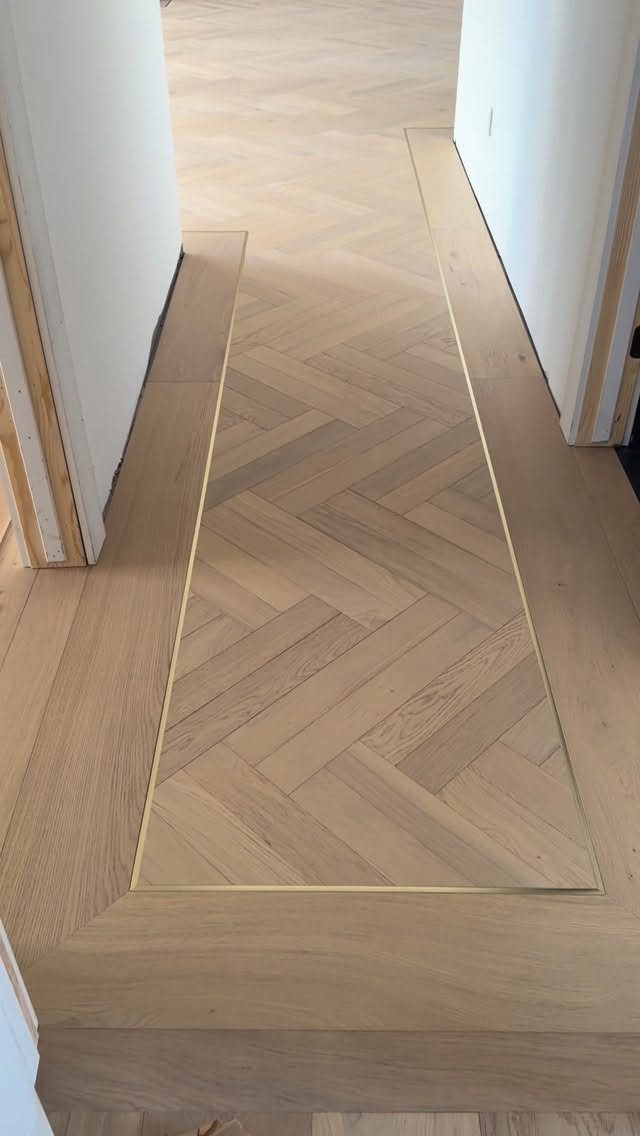
A border of straight planks around a central pattern, with thin metal strips marking the transition, turns an ordinary floor into something intentional without demanding the whole room be treated as precious.
Brass inlay against pale wood reads warm; nickel or blackened steel would go cooler and more modern.
The metal strips are typically 1/4 to 1/2 inch wide, set into a routed groove before the surrounding planks go down, so this is not a retrofit you add after installation.
I have seen homeowners try to fake it with surface-mounted trim and it always looks like exactly that: trim sitting on top, not integrated.
The perimeter border width matters more than most people expect. Too narrow and it disappears; too wide and it starts to feel like a separate rug made of wood.
A moderate width is the safe middle, and that is what I would measure first if I were standing in the lumber aisle right now.

【Size and Coverage】 Each peel and stick floor tiles measures 36 x 6 inches with a 0.05-inch thickness. One pack of 20 vinyl flooring covers up to 30 sq.ft., making stick on floor tiles a budget-friendly flooring solution. Packaged flat to prevent warping or damage, our flooring tiles arrive intact and ready for immediate installation.

Realistic Wood Look: Get the authentic look of real wood with grain texture. These floor planks blend seamlessly into any decor style, adding a touch of timeless elegance to your home.
【Size and Coverage】 Each peel and stick floor tiles measures 36 x 6 inches with a 0.05-inch thickness. One pack of 36 vinyl flooring covers up to 54 sq.ft., making stick on floor tiles a budget-friendly flooring solution. Packaged flat to prevent warping or damage, our flooring tiles arrive intact and ready for immediate installation.
9. Medium Tones Wooden Flooring
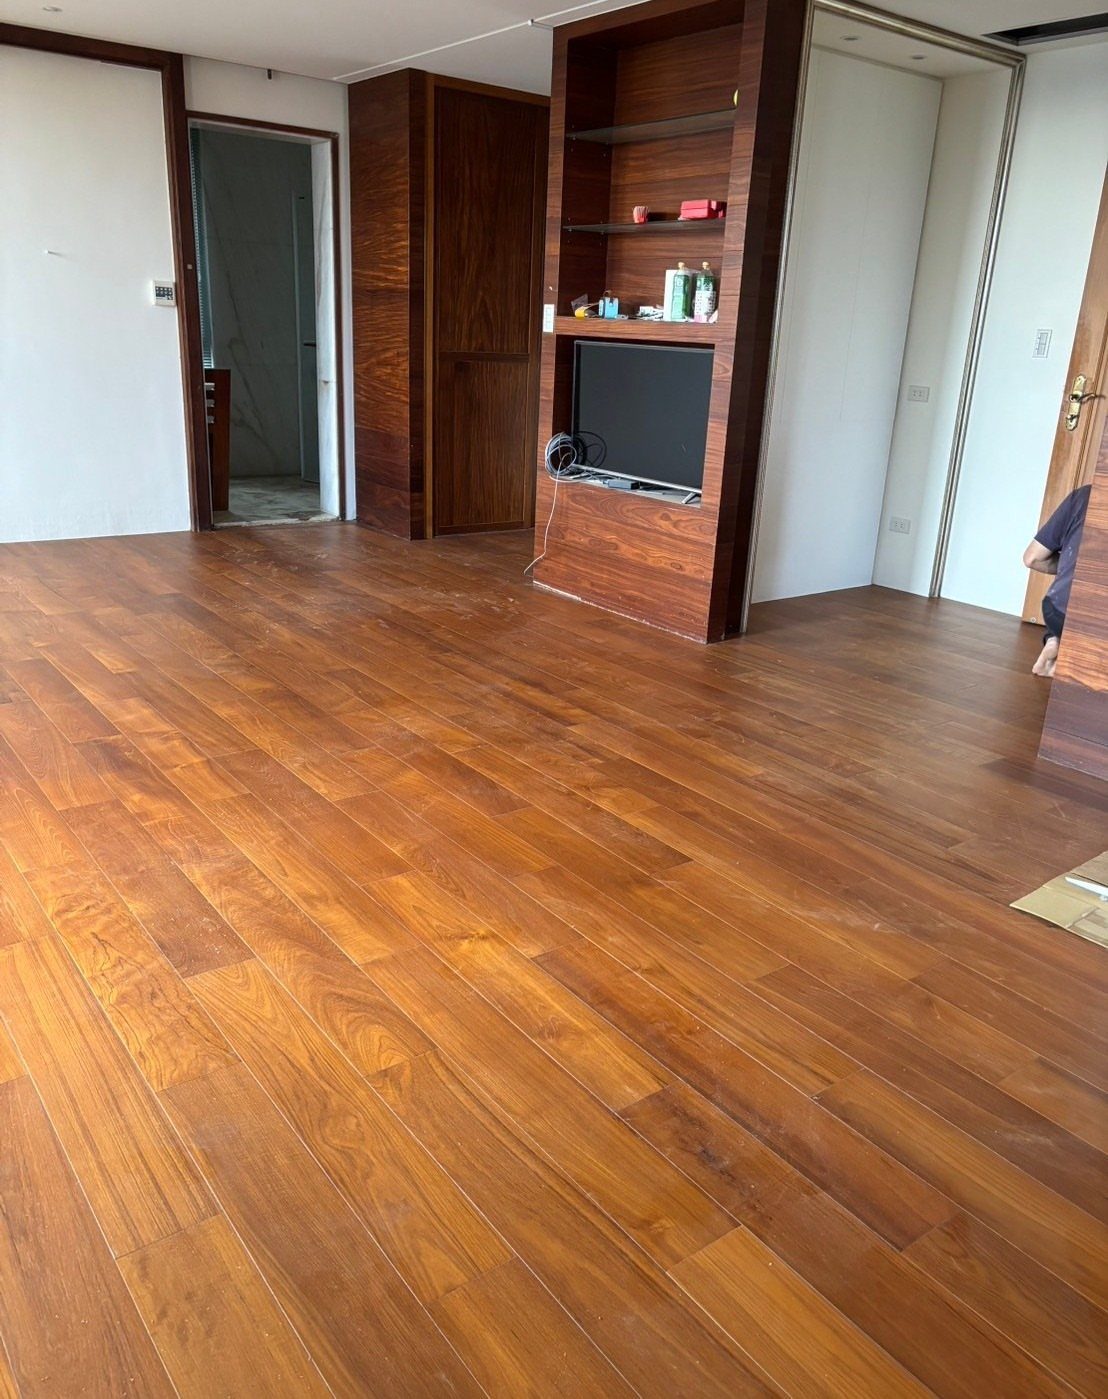
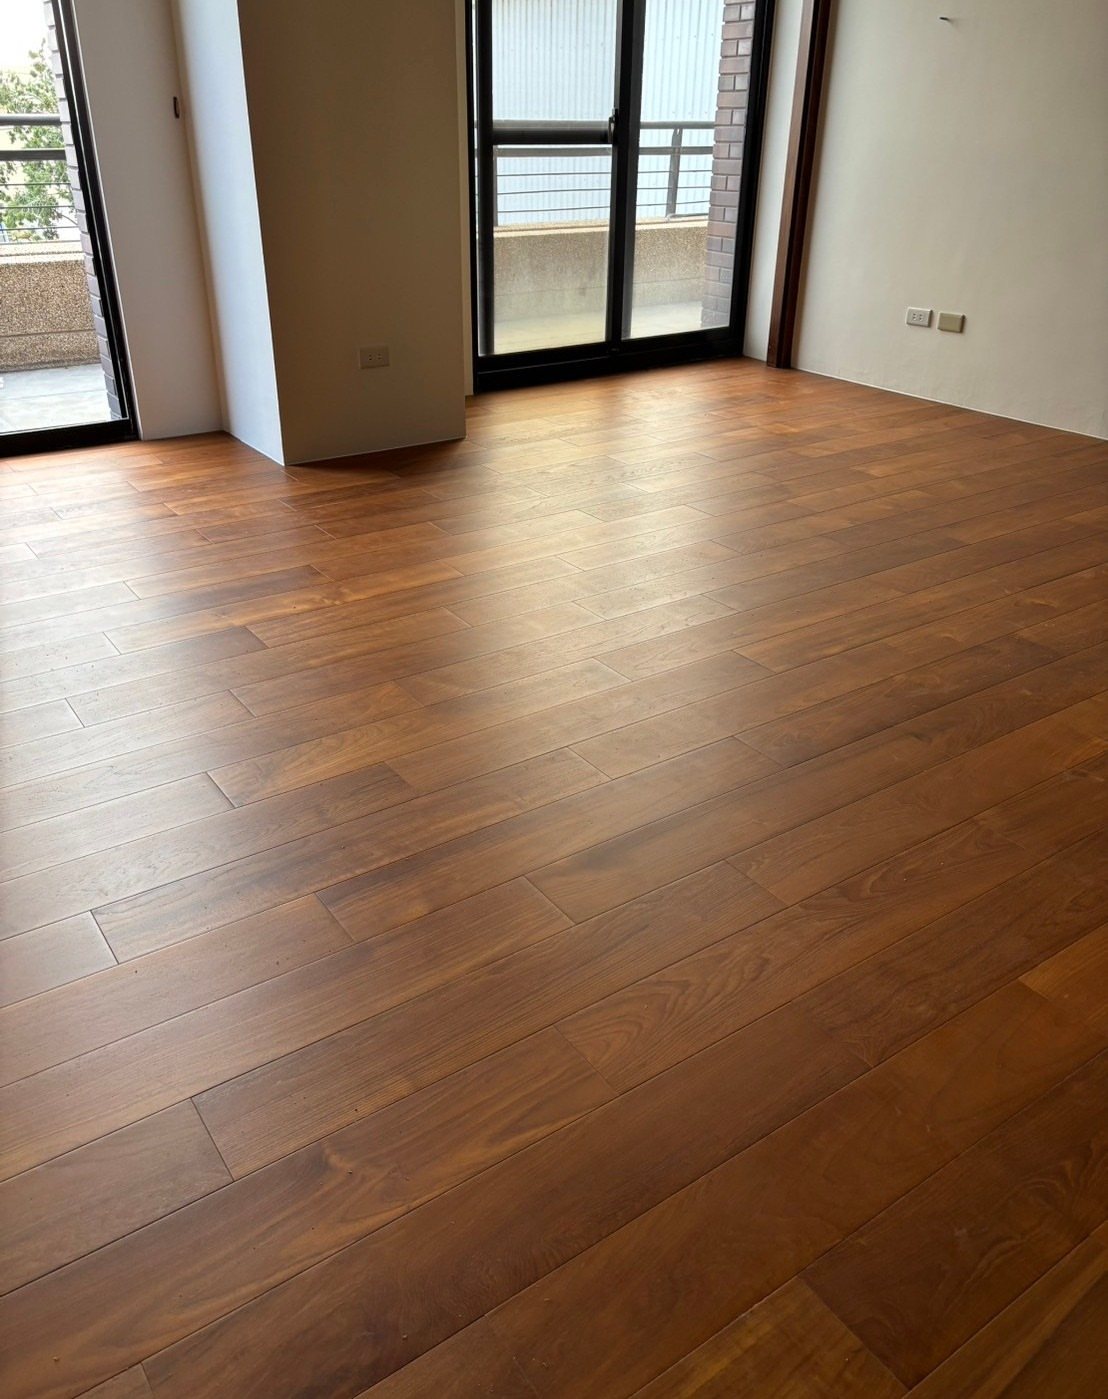
Medium brown sits where the floor holds warmth without the yellow cast that lighter oak can pick up under cheap bulbs, and it hides the dust and scuffing that pale floors show by Wednesday afternoon.
Polished planks in this tone read almost chestnut in person, though photography warms them; in a room with white walls and dark built-ins, they bridge the two rather than competing.
Engineered construction with a brushed UV lacquer finish, similar to the Silver Stone grade, gives you that same open-grain look with better stability against seasonal swelling; solid hardwood at this width would gap and cup in most climates.
I would pick this tone for a room that gets used hard, especially with kids or a dog, because the patina builds invisibly. The maintenance is ordinary: dry mop, damp mop, no standing water.
The real decision is whether you want the floor to be the quiet background or the statement; medium brown defaults to background, which is why designers reach for it when the furniture or the view is meant to talk instead.

EASY TO INSTALL: 3/8'' Thickness & Various Lengths Ensures Sturdy Boards For A Lifetime Of Enjoyment


Unfinished Scrap Wood Pieces: A robust foundation for your artistic endeavors, these craft wood scraps contain a diverse assortment of textures, sizes, hues, and grain patterns. Resembling aged barn wood, this will add to the rustic farmhouse charm of your space
Installation Methods
Tongue-and-groove is the oldest method still in use: each plank locks to the next along both edges, hiding fasteners and leaving a surface you can walk on immediately.
Solid hardwood almost always installs this way, nailed through the tongue at an angle so the next row covers the hole. Engineered wood opens up the other two options.
A flat subfloor matters more than the exact tolerance number on the label; any waviness telegraphs straight through the finished floor and shows up as gaps you will notice every day.
Floating installation is where engineered wood earns its reputation for easier DIY. The planks click together at the edges, sitting on foam underlayment without any attachment to the subfloor below.
Expansion and contraction happen as one sheet, so you leave a 1/4-inch gap at every wall hidden by baseboard.
I would pick floating for a rental or any project where I wanted to haul the floor out again later; glue-down is permanent, and nailed solid hardwood is more permanent still.
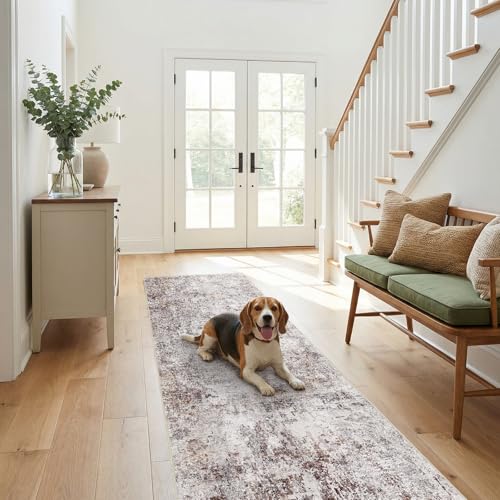
Machine Washable Rug: This 2x8 runner rug is bringing a modern, abstract decor to your home that is also easier to clean.To clean stains from red wine, coffee, food crumbs, you can use a carpet cleaner to hand wash and spot clean,for large indoor rug home washing machines may not have enough capacity,it is recommended that you take it to a professional laundry.

Machine Washable Rug: This 2x12 runner rug is bringing a modern, abstract decor to your home that is also easier to clean.To clean stains from red wine, coffee, food crumbs, you can use a carpet cleaner to hand wash and spot clean,for large indoor rug home washing machines may not have enough capacity,it is recommended that you take it to a professional laundry.

Clean, Shine & Restore: Professional hardwood floor cleaner and polish bundle removes dirt, grime, and scuffs while restoring the natural beauty of finished wood floors without leaving a sticky residue.
Maintenance Tips
Dry-mop daily if you can; grit is what scratches finish, not the walking itself. A microfiber pad lifts dust without pushing it around.
Damp-mop with a well-wrung cloth and a pH-neutral cleaner made for wood; standing water is the enemy, especially on engineered boards where moisture can reach the core through the seams.
Refinishing is the long-term maintenance that separates solid hardwood from everything else. A 3/4-inch solid board carries enough thickness for multiple sanding cycles, typically 1/32 inch removed each time.
Floors older than 10 years usually show the signs: visible scratches, a dulled surface, or color that has gone uneven where the finish wore through first.
Engineered wood with a thick wear layer, 3mm or more, can handle one light sanding, maybe two, but thin-veneer products are done once the factory finish goes.
I would not refinish engineered unless the manufacturer specifies a minimum wear-layer thickness; sanding through to the plywood core ruins the floor entirely.
Cost Considerations
Solid hardwood at 3/4 inch thick runs higher per square foot than engineered, and the gap widens once you add nail-down installation.
Engineered wood spans 3/8 to 1/2 inch total thickness, with the wear layer, the part you will actually see and walk on, ranging from 1mm to over 6mm.
That wear-layer number is what matters for lifespan; 2mm is entry-level, 4mm starts to feel like real insurance, and 6mm approaches the refinishing potential of solid wood at a lower initial outlay.
The price spread within engineered is wide.
A 2mm wear-layer product in a common oak species might land near laminate territory; move to 6mm, a wide plank, or a distressed hickory face, and the cost climbs toward solid hardwood without quite matching it.
I would put the extra money into wear-layer thickness before I paid for exotic species or hand-scraped texture. The core construction matters too: birch plywood handles moisture better than HDF and costs more for that reason.
Sustainability Considerations
Wood is the only floor covering that renews itself in nature; a solid oak floor can last centuries, while vinyl and laminate are designed to be replaced. That longevity is the core environmental case, more than any certification sticker.
Engineered wood complicates the calculation. The veneer layer uses less slow-growth hardwood than solid plank, but the core and adhesives carry their own footprint.
Birch plywood cores are preferable to HDF where moisture might reach them; the plywood lasts longer in real conditions, which is its own form of sustainability.
I would look for FSC-certified or SFI-labeled material when the supplier offers it, but I would not pay a large premium for certification alone if the alternative is a well-made engineered product I will actually keep long enough to matter.
The floor you replace early because it cupped or delaminated is the worse choice, certified or not.
In contrast, Tommy’s company Olde Wood crafts engineered floors that offer a four- or five-millimeter wear layer that can be sanded and refinished every five to 10 years—just like solid wood—so it can last a lifetime.
Frequently Asked Questions
What is the best pattern for wood flooring?
Straight lay runs the boards parallel to the longest wall, which pulls the eye down the room and makes narrow spaces feel wider.
Most DIYers can knock it out in a weekend since every cut stays square and the pattern forgives small mistakes.
Herringbone and chevron add visual texture but demand angled cuts, more waste, and tighter tolerances; I’d reserve them for rooms where the floor is meant to be the statement.
Diagonal can open up a small dark room, though the triangle offcuts mean buying extra material.
What are the current trends in wooden flooring?
Wide planks are everywhere right now because fewer seams read as one open surface, which suits smaller living rooms where narrow boards turn busy.
Light tones in white oak and ash keep climbing for north-facing spaces that need the daylight bounce, while bleached finishes warm up enough to avoid the sterile look.
Geometric patterns like herringbone and chevron are holding strong for anyone willing to pay for the install time and skill.