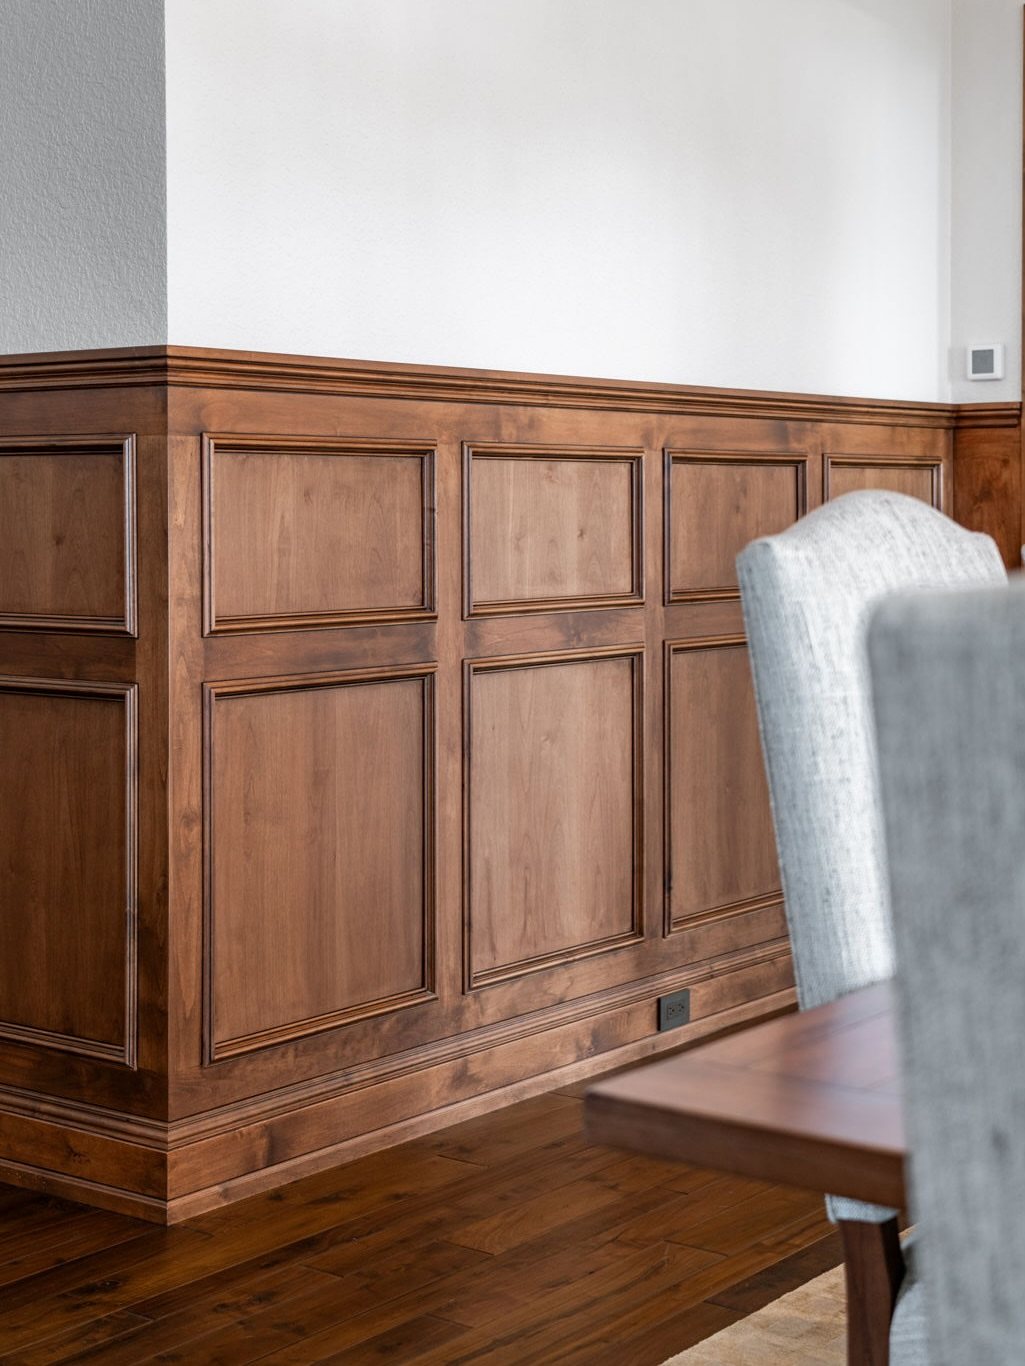
Wood wall trim covers a real range: some of these ideas need nothing more than MDF strips and a Sunday afternoon, others need angled cuts that can eat a whole weekend and still ask for a third try.
Some of these projects forgive a wall that bows or leans; others will fight you every inch if the surface underneath is not flat.
Picture frame moulding only needs a spacer board and patience; geometric shapes ask more of you and your miter saw, especially once you find out how few walls are actually square.
1. Picture Frame Moulding
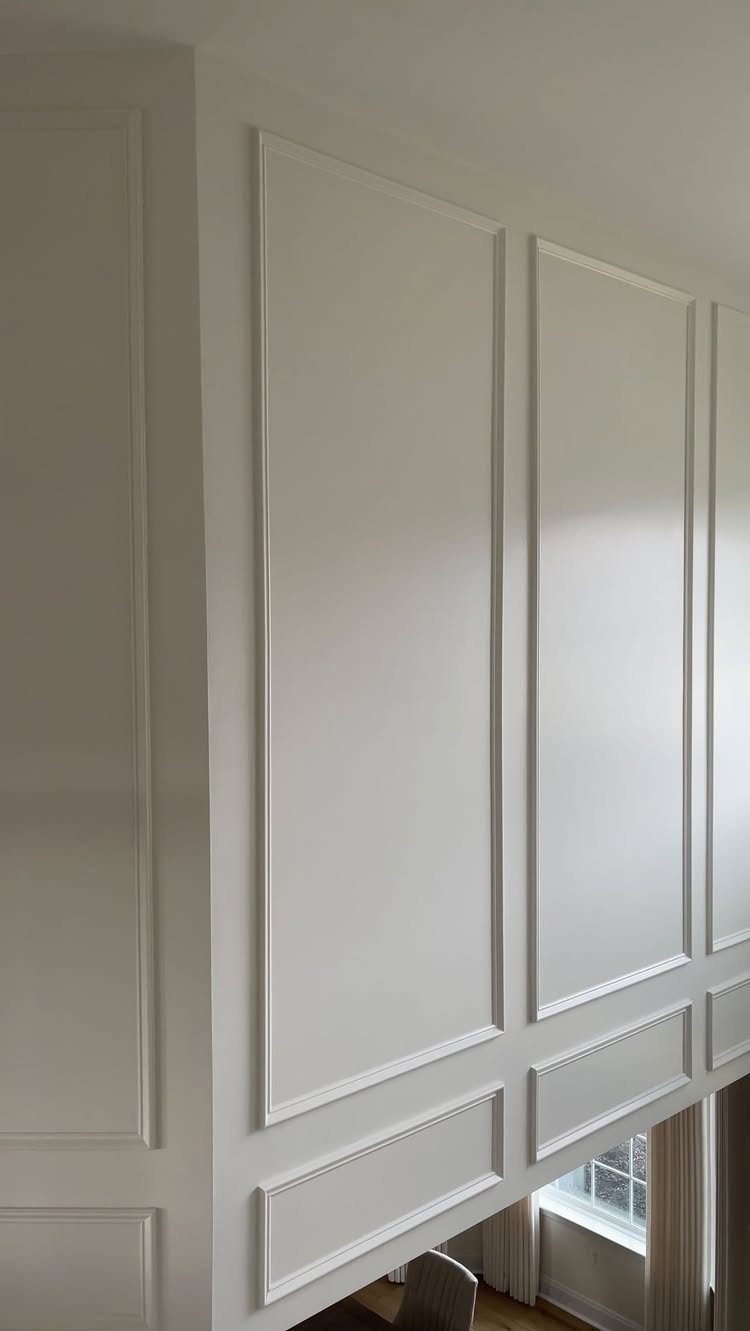
Thin strips of wood form squares or rectangles against the wall, like frames waiting for paintings that never come.
I like this one for renters and first-home owners because the math is simple: a level, a spacer board, and patience get you there faster than you’d expect.
Paint the frames the same color as your wall for quiet texture, or paint the inside of each a different shade if your room runs neutral and you want the shapes to read from across the space.
Caulk every seam before you roll on paint; the smooth finish is what sells the look as built-in rather than stuck-on.
This one suits hallways and bedrooms best, places where you walk past rather than linger up close. The closer you stand, the more you notice the gaps.

Bead Design & Premium PVC:It showcases an elegant 3D bead design, adding subtle texture and timeless refinement to interiors. Made of high-quality flexible PVC, it is durable, flexible, deformation-resistant, and bends smoothly for curved surfaces, corners and irregular edges

430-PIECE FASTENER ASSORTMENT: Includes matching stainless steel nails in six practical sizes. The combined assortment provides convenient fastening options for household, craft and woodworking projects.
2. Board-and-Batten Wall
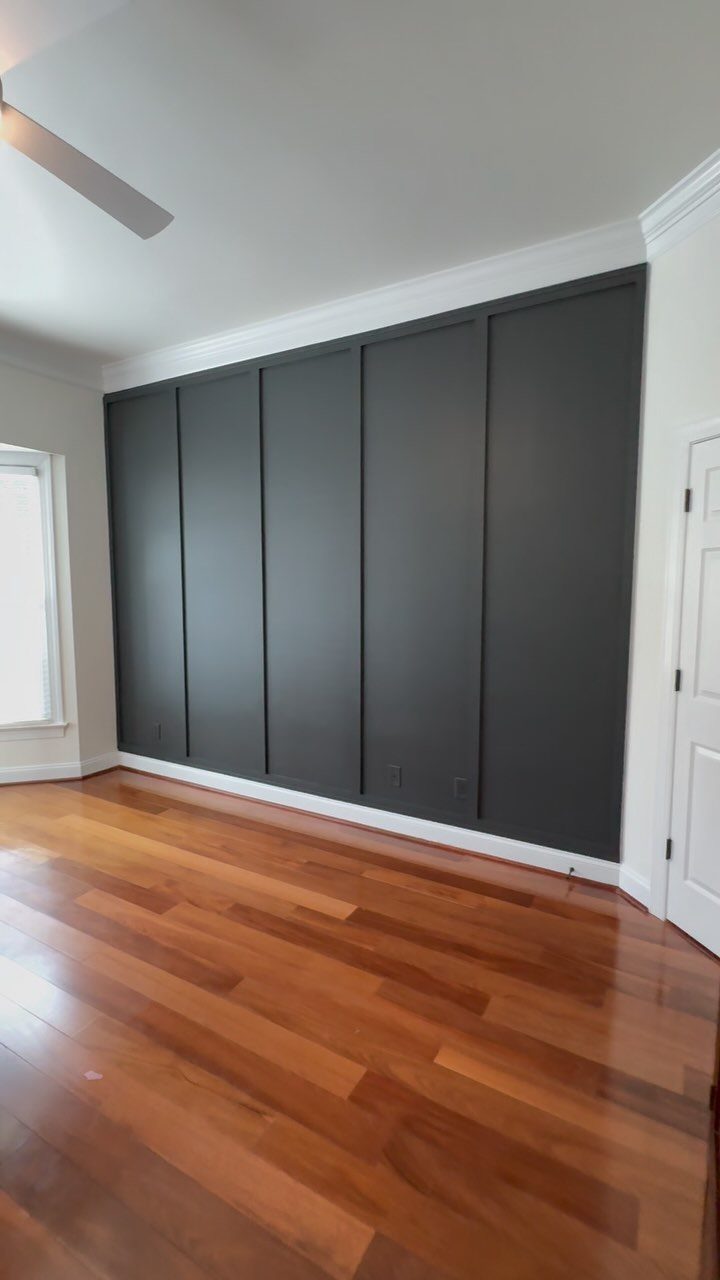
Wide vertical boards with narrow strips hiding every seam give you the paneled look without the paneled price.
I’ve put this in a nursery, a garage, and a hallway; it forgives walls that aren’t square and cuts that aren’t perfect, which is why it keeps ending up on my list.
Most designs run straight boards at even spacing. No mitered corners, no angled headaches.
Cover a full wall or stop at chair-rail height as an alternative to wainscoting; both read as intentional.
Dark paint brings out the architectural detail against lighter furniture, though I’ve seen it work in white-on-white when the texture itself is the point.
This is the one I’d hand to someone who’s never held a nail gun. A grid of squares reads modern instead of cottage when you want something cleaner.

Premade Board and Batten Paintable Wainscoting Kit: Package includes 20 premade molding trim slats, 4 decorative edge strips, and two pairs of gloves for convenient installation

Quantity and Coverage: this board and batten wall panel kit includes 42 pre cut MDF strips, each approx 3.15"W x 0.35"T; The finished wall coverage is approx 157.5 x 94.5 inches/ 400 x 240 cm: simply measure your wall and order the exact number of kits needed

Pre-Cut Arch Wainscoting Panel Board:A complete set of 4 pre cut arched wall decorative strips, each set containing 9 components: one arched component and 8 vertical strips, totaling 36 components; These 9mm thick panels can be easily connected, adding a delicate touch to doors or walls
3. Wainscoting
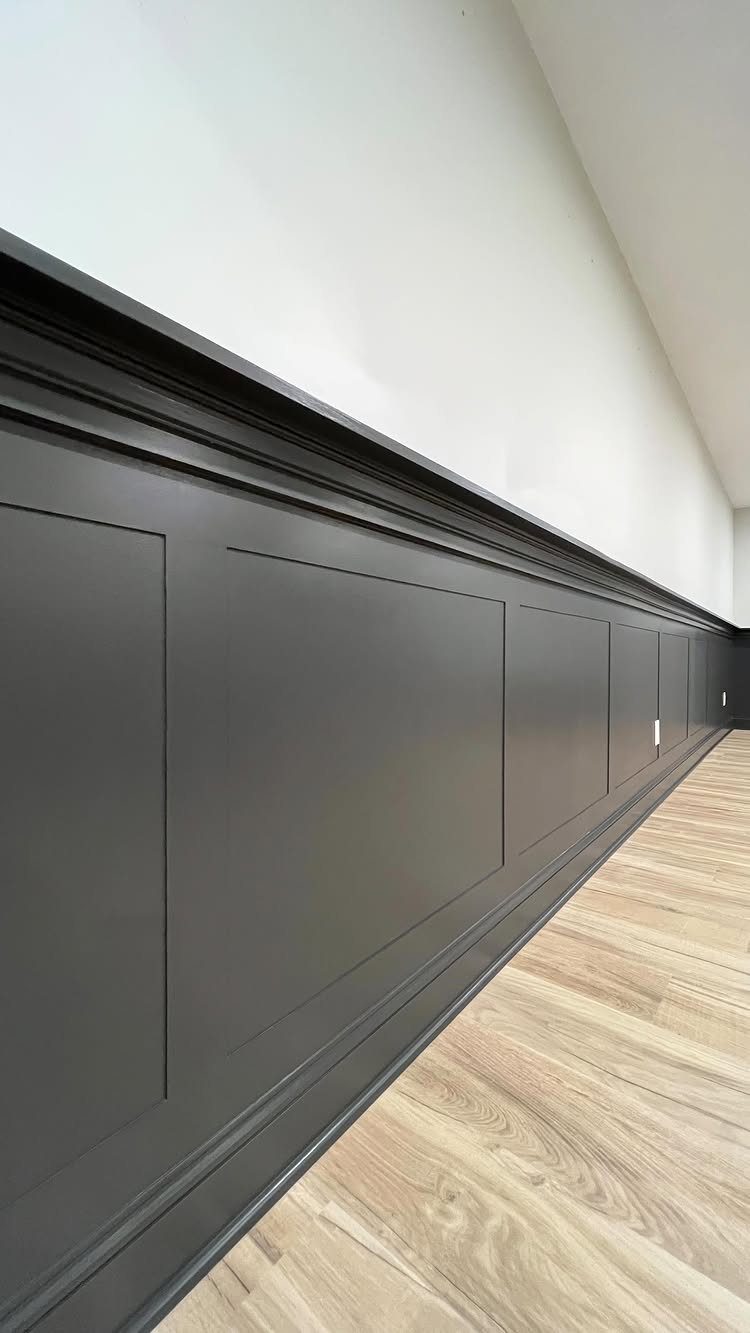
Paneling that runs one-third to one-half up the wall, capped with a chair rail, started as protection for high-traffic dining rooms. Now it shows up anywhere you want the eye to read wall as architecture rather than blank space.
MDF gets you the smooth finish without the hardwood price; cut strips on a table saw with a finish blade so the edges don’t fuzz. Nail them up, fill the holes, caulk the gaps, prime and paint.
The wainscoting in that office by @nadine_stay went earthy green over skinny vertical slats, which reads current instead of colonial.
One builder added decorative trim over a 1×4 for the top rail and screwed in a sill plate at the right height for setting down a drink. That’s the kind of detail that turns standard into something you actually use.

Effortless Installation — Experience the simplicity of our 3-step installation process: simply cut, peel, and stick. It's a swift, hassle-free process.

DIY Installation Made Easy: Cut, peel, and stick in just 3 simple steps. No special tools required. Effortless installation for a quick and hassle-free experience.
DIY Installation Made Easy: Cut, peel, and stick in just 3 simple steps. No special tools required. Effortless installation for a quick and hassle-free experience.
4. Vertical Paneling
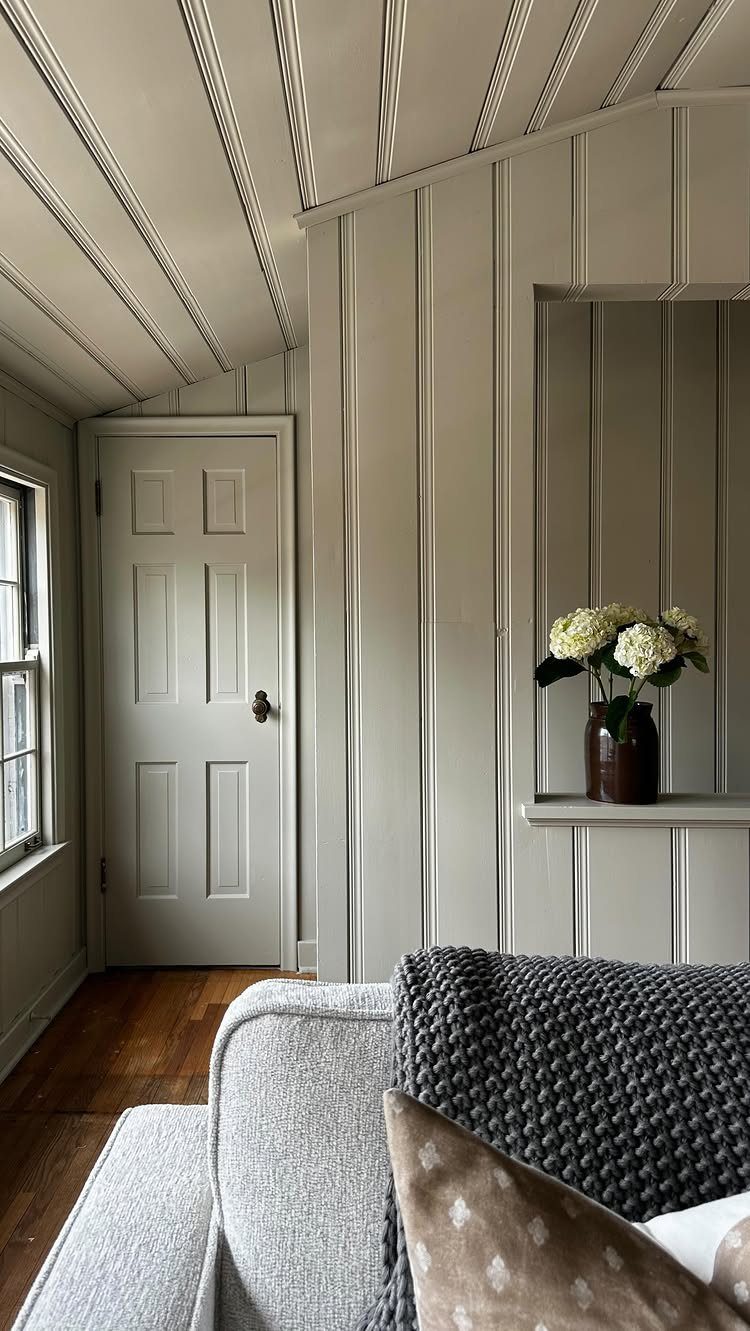
Boards running floor to ceiling pull the eye upward, which matters more than you’d think in rooms where the ceiling feels low. Running boards up the wall and across the ceiling turns a corner into one continuous plane.
MDF strips primed before installation save you a coat later.
Attach them with construction adhesive rather than nails if you want to skip putty work; just don’t line your panels up with the ceiling or baseboard, since those lines are rarely as straight as they look.
Level each strip on its own.
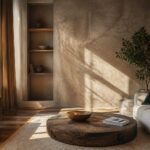
Earth-toned wood trim against earthy furniture gives you a room that feels considered without feeling decorated. Horizontal placement would widen the room instead; turn the boards if your problem is narrowness, not height.

【REAL WOOD】– Made of 100% dried fir wood imitating vintage reclaimed barnwood appearance for interior finish. The colors will vary from browns to grays depending on the batch.

EXCEPTIONAL ACOUSTIC PERFORMANCE - Our wall wood panels, with a high 1750gsm felt density, significantly outperform standard 1350gsm options in sound absorption and noise reduction, creating a peaceful and acoustically optimized environment.
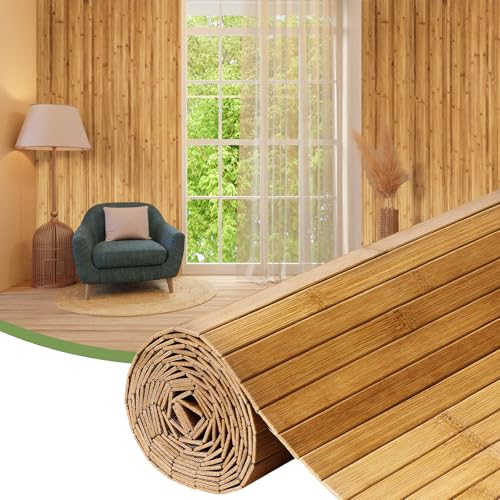
【Instant Natural Warmth & Texture】Bring nature indoors. Whether aiming for Zen, Tropical, or Boho styles, these premium bamboo panels add warmth to cold drywall. Perfect for creating elegant accent walls, ceilings, and wainscoting without messy renovations
5. Boxes with Interior Trim
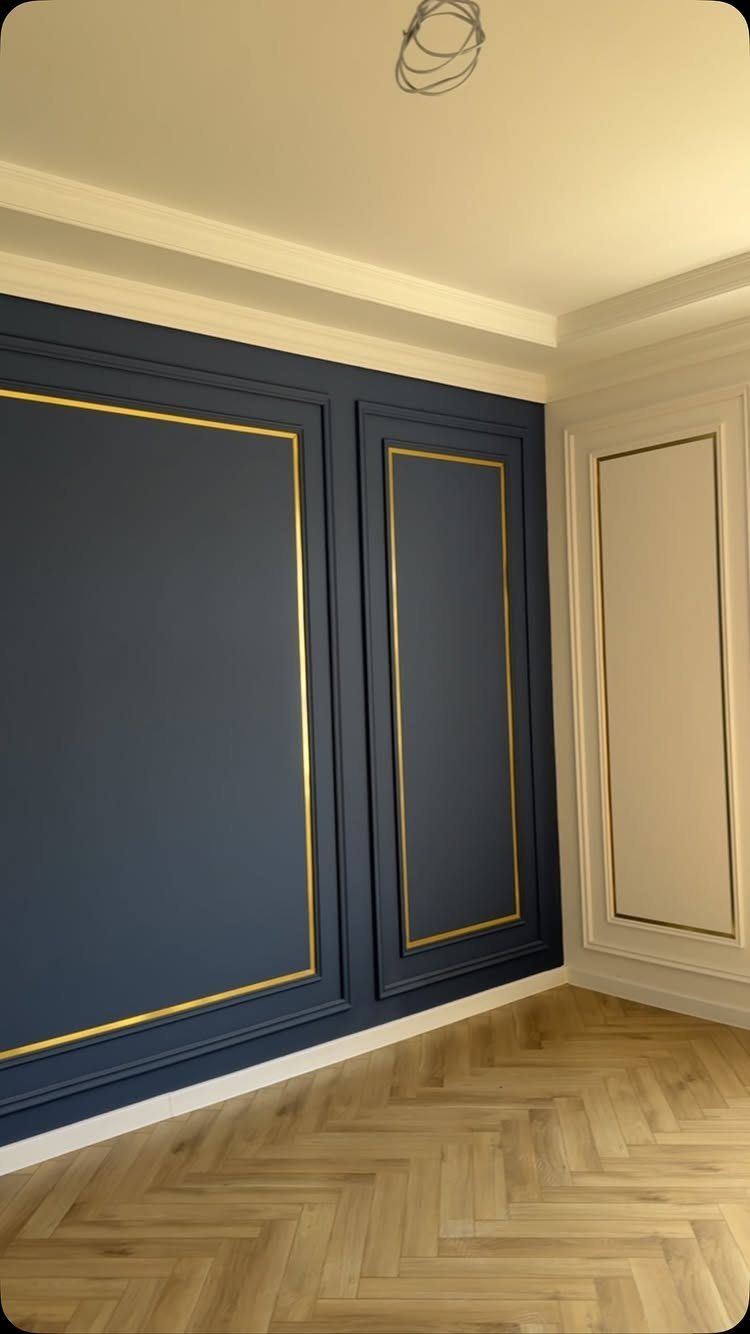
Basic rectangular boxes on the wall get interesting when you add a second, smaller frame inside each one.
Ogee, rope, or half-round molding changes the shadow line and the light catch; the more layers, the pickier your spacing has to be.
I’d call this intermediate not for the cuts but for the measuring. Every layer compounds your error, so work slow and check twice.
One builder team sketched their box layout directly on the wall with pencil before touching a saw; nail or adhesive holds the trim once you’re sure.
Thin gold trim inside the boxes reads formal in a way paint alone wouldn’t. For a first project, stick to one color throughout.
Add the metallic or contrasting layer once you’ve learned how your walls deviate from plumb.

Enough Quantity and Dimensions: the package includes 12 DIY wood trims, each with a measurement of 0.79 inches in width, 15.75 inches in length and 0.16 inches in thickness; The wooden trim is delicately designed to suit every cut according to different thoughts, ensuring a nice finishing touch

Color and Size: our decorative line strips are made of non-traditional wood colors, which can easily blend into your decoration and add a touch of understated elegance; The size is 15.8 x 1.6 x 0.6 Inch (40 x 4 x 1.5cm), designed to an ideal proportion, easy to install, and will complement your wall

Enough Quantity and Dimensions: The package includes 13 DIY wood trims, The wooden trim is delicately designed to suit every cut according to different thoughts, Ensuring a nice finishing touc
6. Geometric Wood Trim Design
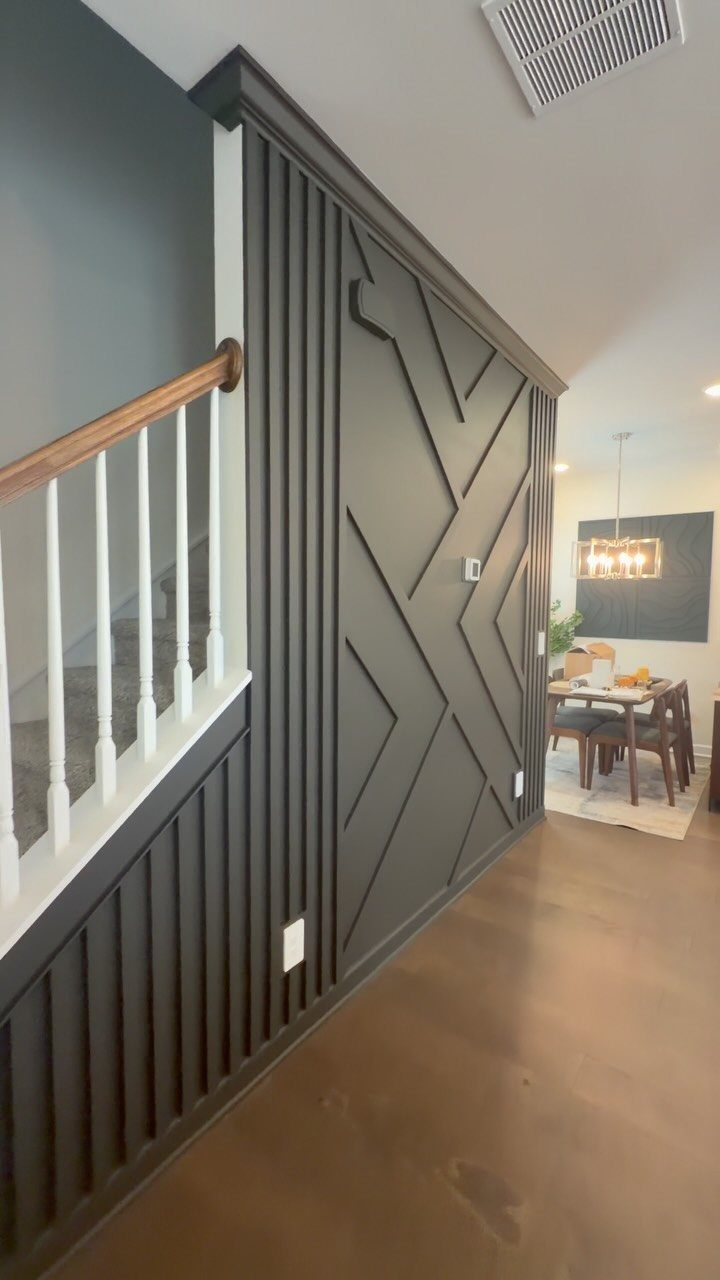
Triangles, diamonds, and herringbone shapes built from trim pieces ask more of you than straight lines ever will.
A miter saw and a tolerance for trial and error are the real requirements; angles that look simple on paper fight back against walls that aren’t square.
This one is for the reader who treats a weekend project as puzzle time. You end up with a wall no one else has, which matters if you’re tired of seeing your living room on everyone else’s feed.
Intersecting diagonals against vertical slats sit somewhere between organized and freeform, with shadows that shift as the light moves.
I’d point the math-anxious toward board-and-batten instead. This one is for when you want the story of how you spent your Saturday to include "third try finally fit."
Installing modern wall trim is a fairly simple and affordable DIY project, and yet the results are surprisingly impressive. Wall trim adds character, makes a space look high-end, and creates a custom look that goes way beyond builder-grade.

Traditional style; country blue with painted wood grain finish

Package Includes 600 Nails in 4 Different Sizes

Photo Frame, Color: Black with Burgundy and Gold Trim. Outside Frame Size: 13x16 Inches
7. Chevron and Herringbone Wall Trim
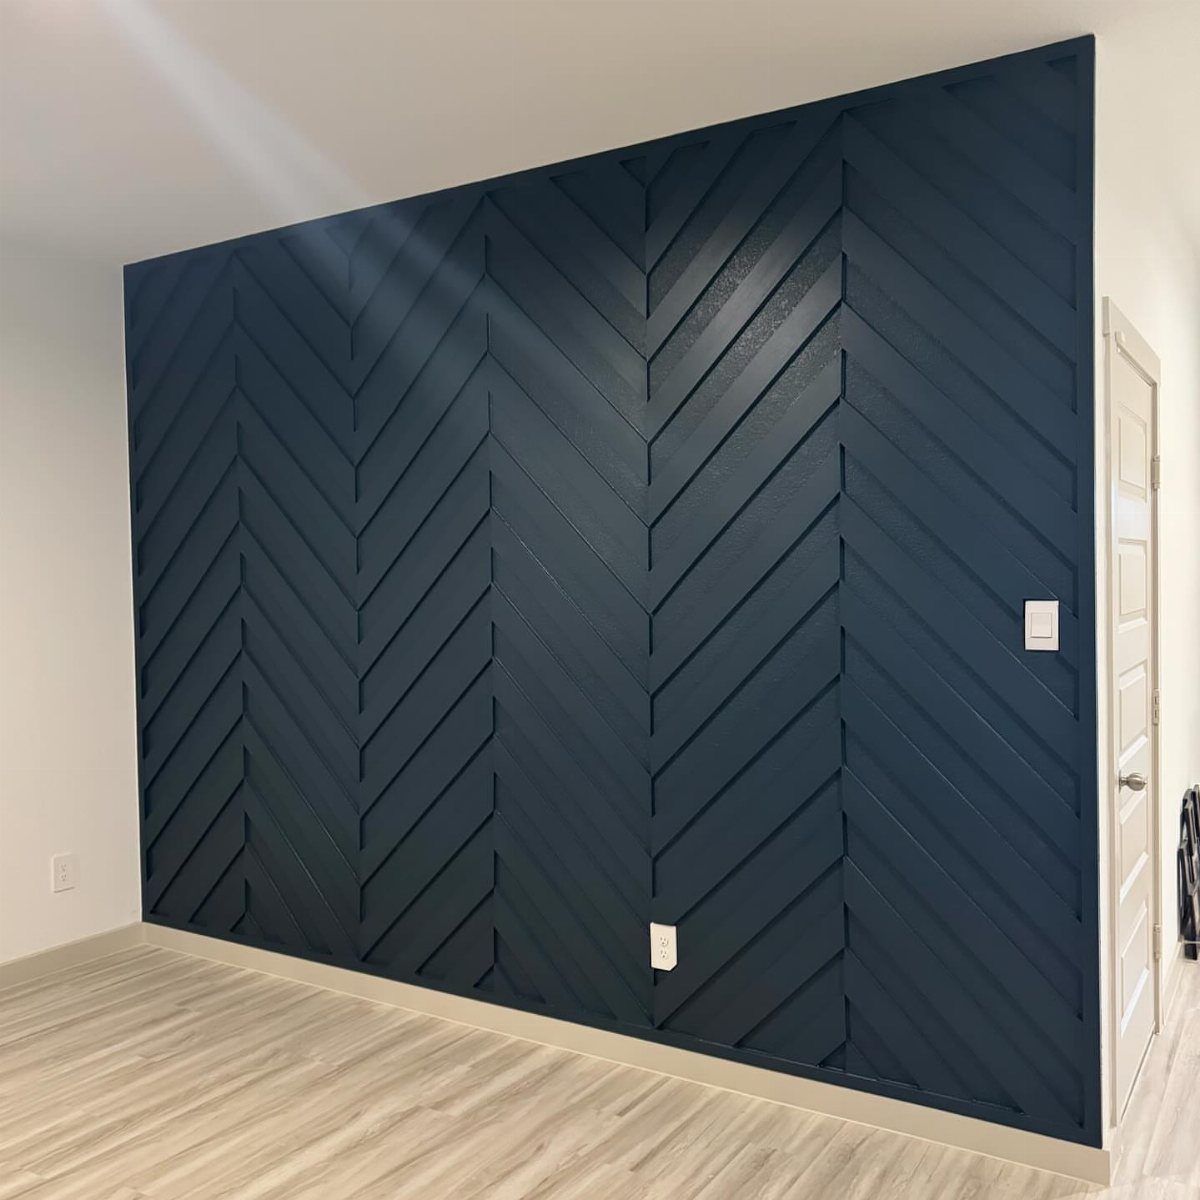
A chevron wall sends the eye moving in a zig-zag rhythm that straight boards cannot touch. The pattern reads as energetic without shouting, and natural wood tones against that dark background give the geometry its full effect.
The angles are the hard part. Each piece gets cut at an angle, and the points must meet dead-on or the whole wall looks off.
A miter saw with a stop block saves your sanity and your material. I would build one full V first, check it against a square, then use it as a template for every repeat.
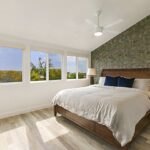
This one asks for patience more than skill. Behind a bed with plain white linens, it does the heavy lifting; in a busier room, it fights everything else for attention.

Complete Quality MDF Wainscoting Kit: you will receive a full set of 20 pcs MDF wall molding kit(94cm * 14 pcs, 91cm * 6 pcs), size of the wainscoting kit: 107.5in x 80in x 0.35in, the panels allow for comprehensive coverage of your chosen space. This wall molding kit is made from quality MDF, durable and easy to maintain, making it a robust and reliable solution for your wall molding needs; The panels are waterproof, ensuring durability, smooth and burr-free surface is simple to clean

All-in-one Molding Kit: This premade board and batten wainscoting kit includes 20 molding slats and 3 decorative edge strips for quick accent wall assembly. It is supplied to build classic board and batten wall designs

Elevate a hallway, bathroom or living area with a board and batten accent wall
8. Arched Trim and Scalloped Accents
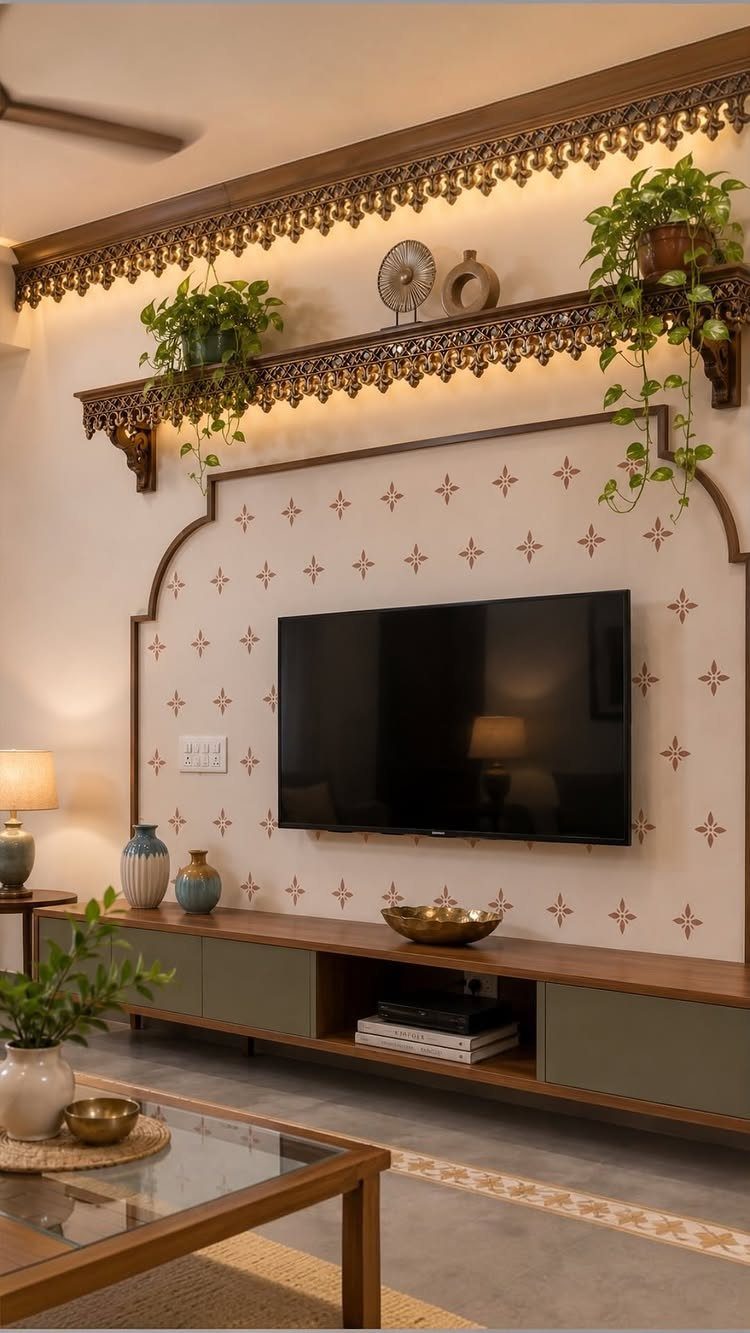
Curved trim around a television turns the black rectangle into something intentional, almost architectural. The scalloped shelf above it softens the whole wall and gives you a place for trailing plants or small objects that draw the eye up.
The arch is built from flexible moulding or thin strips kerfed on the back so they bend without snapping. Either way, you trace your curve onto the wall first and build a temporary guide to nail against.
The scallops are cut from thicker stock on a bandsaw or with a jigsaw, then sanded smooth; matching the curve to the arch below ties the two pieces together.
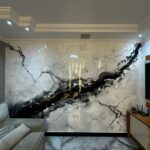
Patterned wallpaper already carries plenty of visual weight. I would keep the wood tone warm but not wild, and let the trim frame rather than compete.

PLASTPRO PVC TRIM KIT, 2 PIECE: Complete your Plastpro wainscoting panels installation with the matching trim kit. Includes 1 pre-finished white PVC chair rail and 1 base molding with integrated rubber seal that blocks moisture from seeping between wall and panels. Pre-grooved to snap directly onto Plastpro 3 Ft and 8 Ft PVC wall panels.

Matte TPE Rubber Material (Not Paintable) :Crafted from durable TPE (Thermoplastic Elastomer) with a natural matte finish. Please note: This is a flexible, rubber-like decorative trim, not rigid solid wood. Important Limitation: This product comes unpainted and is NOT suitable for spray painting. It is designed for stain resistance and easy cleaning
DIY Installation Made Easy: Cut, peel, and stick in just 3 simple steps. No special tools required. Effortless installation for a quick and hassle-free experience.
9. Large Grid Wood Paneling
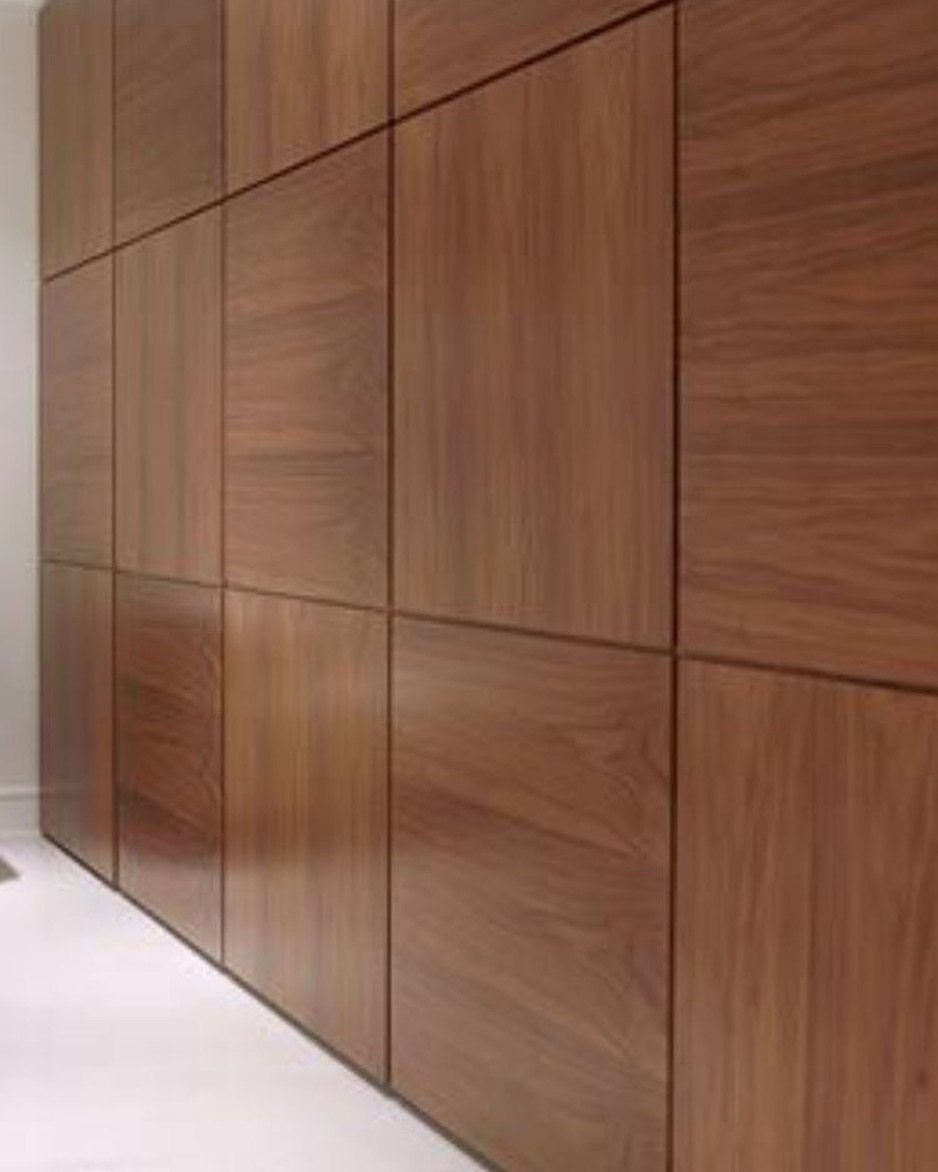
Oversized panels in alternating grain directions make a whole wall feel like furniture. The scale suits rooms where smaller trim would read as busy, and the grid gives you structure without any single piece demanding attention.
Each panel is a rectangle of veneered plywood or solid stock, sized to your wall and spaced with a consistent gap.
Plan the layout on paper first: measure twice, divide by your desired panel count, and accept that the last row may need adjusting.
A track saw or straightedge and circular saw keep the cuts clean; the grain alternation happens at the layout stage, not by accident.
Gaps hide small sins, and the large format means fewer pieces to cut and fewer chances to drift off square.

𝗠𝗼𝗱𝗲𝗿𝗻 𝟯𝗗 𝗧𝗲𝘅𝘁𝘂𝗿𝗲𝗱: 3D wood slat design creates depth and visual interest while enhancing sound absorption. Great for Bedroom, office to reduce echo and noise, both practical and stylish

【Superior Sound Absorption】: Designed with a 0.35" MDF board and a 0.35" high-density polyester fiber backing, these wood slat acoustic panels offer enhanced sound control through a balanced dual-layer structure. The thicker MDF layer helps improve sound blocking and structural stability, while the dense 0.35" felt backing effectively absorbs echoes and reduces noise reflection. Made from non-toxic, eco-friendly materials, ideal for creating a quieter, more comfortable space.

Easy Self Adhesive Installation: no tools or nails are required for installation, as these peel and stick wall panels feature a strong pre applied adhesive backing; Simply peel off the protective film and apply the wallpaper peel and stick style to any smooth surface; It is an ideal choice for DIY beginners and renters looking to refresh their home decor quickly
Installation Tips
A level is non-negotiable. Even walls that look straight will betray you once the first strip goes up crooked and every piece after it compounds the error.
I measure twice, cut once, and still expect to trim a hair off the last piece in any run.
Clean edges matter more than perfect lumber.
The intricate patterns, tight curves, and angles that fight back against plaster walls are where I’d call in a pro. A day’s labor on a geometric wall costs less than replacing ruined material and still hating the result.

Size: Wallpaper border about 90.5" L(7.54Ft) x 3.14" W, thickness: 0.23in(6mm), black color, easily trimmed to the desired length according to needs (please do not pull it hard, the foam will shrink back)

Easy Application: Our product boasts a hassle-free installation with just three easy steps: cut, peel, and stick
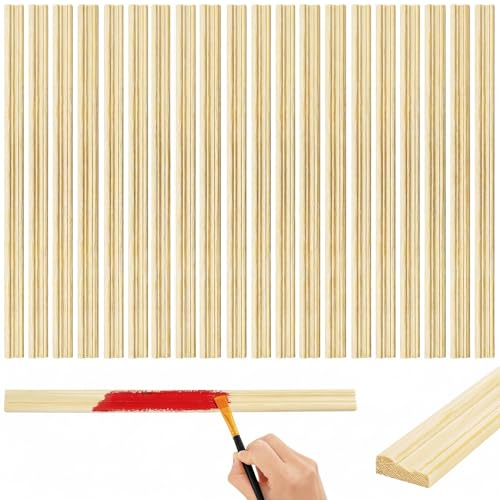
Ready to Use: The package includes 24 packs of unfinished wooden panels (15.7" L x 0.8" W x 0.3" H), providing ample pieces to create a stunning feature wall or accent multiple small areas in one go. It's the perfect DIY wall molding solution for home and offices to add instant character
Choosing Materials
MDF is the budget pick and the practical one. It comes primed, paints smooth, and saves you a step.
The edges don’t fuzz if you cut with a finish blade, and for paint-grade work the savings add up fast.
Oak and maple are the hardwoods worth naming if you want the grain to show through stain. Oak takes abuse without denting, which matters in a hallway or behind a dining chair.
Maple is harder still, with a subtler grain that reads modern.
I default to MDF for anything that ends up painted, solid stock for anything stained. Veneered plywood works for large panels where the scale would make hardwood price out.
The core stays stable, the face shows grain, and the weight doesn’t fight you during installation.
Color and Finish
Contrast reads as intentional. A warm wood tone against cool gray walls, or crisp white trim against deep charcoal, gives the eye something to follow around the room.
Same-color trim dissolves into texture; different-color trim draws lines.
I like satin or semi-gloss on trim even when walls stay matte. The sheen difference catches light at the edges and makes the architecture feel finished.
Natural wood against painted walls is its own contrast. Keep the wood tone consistent with other warm elements in the room, floor to furniture, or it floats untethered.
Design Considerations
The trim style should talk to what is already in the room, not shout over it. A room full of straight-lined furniture wants straight-lined trim; curves in the upholstery or a round mirror invite arched or scalloped details.
The eye notices harmony more than it registers any single choice.
Large walls swallow small patterns and make them look like texture instead of design. Oversized grids or wide board-and-batten suit big surfaces; picture frame moulding gets lost above a certain scale.
In a busy room, one wall of trim is enough. Two walls of competing pattern read as restless, not rich.
Furniture placement matters at the planning stage. A bed frame that overlaps half a picture frame looks accidental, not layered.
Measure your pieces, mark their heights on the wall in tape, and build around where the room actually lives.
Frequently Asked Questions
What are the current trends in wall trim molding?
Wall trim is back as a permanent way to add architectural character rather than chasing trend colors. Picture frame moulding, board-and-batten, and vertical paneling lead the list because they read as built-in detail and age well.
What is the wood trim around a wall called?
It goes by wall molding, trim, or moulding depending on where you shop. Wainscotting, board-and-batten, and picture frame molding are all variations of trim used to give a room architectural detail.
The name changes with the style, not the material.
What are some creative ideas for wall trim?
Picture frame moulding gives you quiet texture or colored shapes against a neutral wall. Board-and-batten works at full height or stopped at chair-rail height as wainscoting alternative.
Geometric designs, chevron patterns, and boxes with layered interior trim add shadow lines that shift as light moves. For something softer, arched trim around a television or scalloped shelves above it curve the usual straight lines.